Cinematography Breakdown - Gibson Guitar's The Songbook: Fantastic Negrito
In today’s blog we’re taking a look at a recent shoot for Gibson Guitar’s series, The Songbook, featuring the artist Fantastic Negrito. If you’d like, feel free to check out the video above.

Table of Contents:
Introduction
The Gibson Songbook series showcases various artists in intimate, stripped-down acoustic sets. This format not only allows listeners to experience their favorite musicians in a different light but also provides an opportunity to explore the artists' history and the inspiration behind their work. In this blog, we’ll take a closer look at one of the episodes I shot featuring the blues artist, Fantastic Negrito. Through a three-song performance and an insightful interview, this episode delves into the heart and soul of his music, and offers a glimpse into the life and influences of the Grammy Award-winning artist.
Scope and Schedule
This was a challenging shoot from a scheduling standpoint. We had only a few hours to load in, set up the equipment, and film the performance and interview segments with our talent, all while keeping in mind that the bar location we were filming at would be open for business later that evening. With a hard out at 5 pm, it was crucial to work as efficiently as we could to make sure everything with the shoot went smoothly and we utilized our time efficiently.
Our crew for this shoot consisted of several Gibson TV regulars. The director, Riley Bray, not only oversaw the project and conducted the interview, but also operated one of the cameras throughout. As the Director of Photography, I also jumped on to operate another camera. We had three other dedicated camera operators on set, a digital loader to manage the footage, a sound mixer for the interview segment, and a separate sound mixer dedicated to the live performance segment.
For grip and electric, we had two swing G&E crew members and a production assistant who were helping to set up and organize all the equipment. On top of that, we had a hair and makeup artist to ensure our talent looked their best on camera. Given the tight schedule, many of the camera operators also pitched in to help with grip and electric during setup. It was truly an all-hands-on-deck situation, with everyone working together to make the most of the limited time we had to shoot.
In the upcoming sections, we’ll dive into the specifics of the camera gear, lighting setups, and the techniques we used to tackle all the logistical and creative challenges to make this shoot a success.
Camera Gear

Camera Gear
Mixing modern and vintage optics
For this shoot, we were tasked with having 5 cameras cover the performance segment, so we opted to use Gibson’s in-house Canon C500 MK2 full-frame cameras. We paired them with Canon CN-E lenses, which gave a sharp, clean look to the performance. I shot the performance at a t/2.8 aperture to keep some detail in the background and to see more of the environment of the stage. Additionally, I used a Canon L Series 24-70 f/2.8 lens on the A-Camera which would be constantly pushing in and pulling out on a dana dolly throughout the performance, so I matched the stop on all cameras to that, my slowest lens. I chose that lens in particular as I want the ability to capture multiple size options of that angle, as well as utilizing the autofocus capabilities of that lens, as all the camera operators were pulling their own focus throughout the shoot.
For the interview portion and B-roll segments, I used my set of cine-modded Leica R lenses which is made up of all 1970s-era lenses. The images they create are sharp with a smooth falloff, and still look very flattering on the talent, and they flare beautifully. The modifications to my lenses allowed us to use them on the C500 cameras seamlessly as they all have been converted to use a Canon EF mount. This combination provided us with a more organic and intimate visual for the interview and B-roll portions of the shoot.
When I compare the two different lenses used throughout the shoot, it's clear to me that each set of lenses contributed significantly to the overall look. The Canon CN-E lenses provided the sharpness and clarity I wanted for the performance segment, while the Leica R lenses added a unique character and separation to the interview and B-roll footage. By mixing different lenses for each segment, I was able to create a distinct visual style for each section, which I feel resulted in a more engaging viewing experience.
Lighting and Grip equipment used
Grip
Cribbing
Safety Chains
3 Split C-Clamps
Various lengths of speedrail (3’, 4’, 5’)
Various speedrail connectors
over-under connectors
jr and baby pipe clamps
C Stands
Combo Stands
2 Dana Dollies
1 4x4 Ultrabounce Floppy
2 4x4 Solid Floppy
Lighting
1 Aputure 1200D
2 Litemat 4+
2 DOP Choice Litemat Snapgrid
1 Aputure 120D w/ 36º Spotlight
2 Aputure 300x
1 Aputure Nova with snapgrid
Fabrics and Frames
1 6x6 Unbleached Muslin
1 6x6 Magic Cloth

Location Scouting
Gold Diggers Bar

Floorplan of Gold Diggers Bar
Luckily, this was my second time filming an episode of this series at this location - so I wasn’t going in blind, and the rest of the crew had already shot several episodes here over the years. Everyone having some prior experience filming here was extremely helpful, as we came into this shoot with a clear understanding of the location's limitations and already had a workflow for the best areas to stage our equipment to keep it organized.
One of the most significant challenges we faced on this shoot was not having to ability to do a pre-light or any rigging at the location the day before. In situations like this where time is limited, thorough prep becomes essential. A few days before the shoot I spent time in pre-production creating diagrams using Elixxier’s Set.A.Light program that I shared with the crew which detailed my lighting plans for both the interview and the performance segment.
Adding to the challenge of this shoot was the lack of clearly defined roles such as a gaffer and key grip on set. This meant that, as the Director of Photography, I had to take on the additional responsibility of placing the order for any additional grip and lighting gear we’d need to rent, which added an extra layer of complexity to my role.
Performance Pre-Vis vs. Final Frames:
A Comparison of Planning and Execution


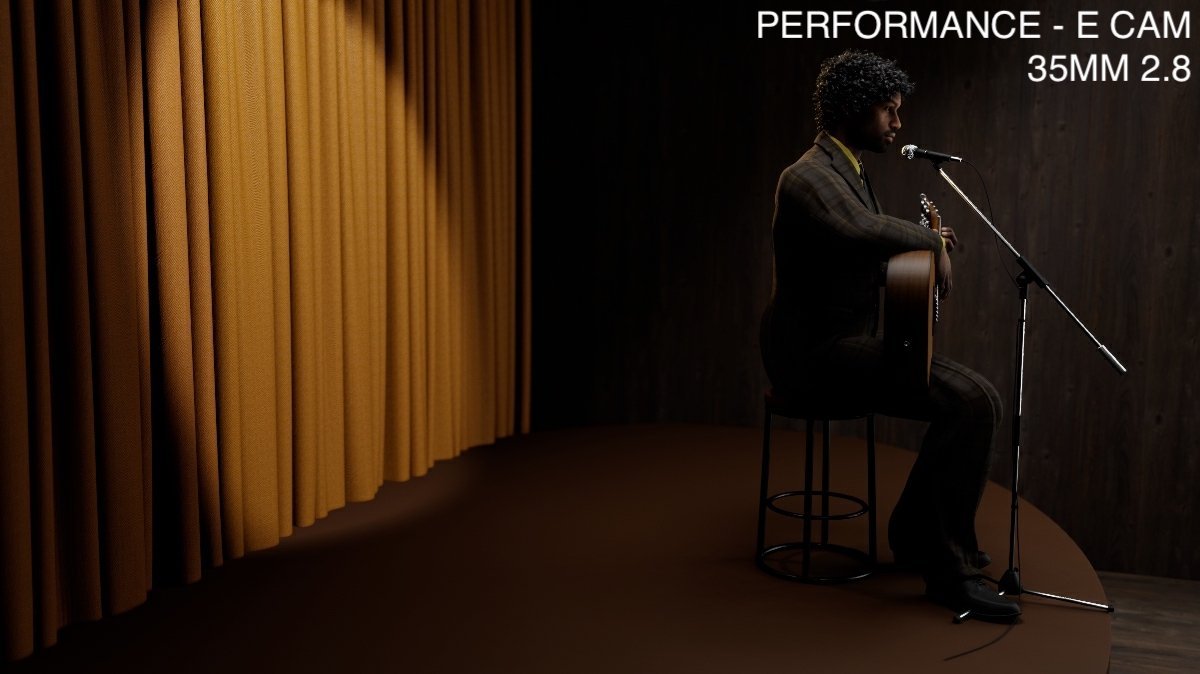
Comparing the pre-visualization images I created in Elixxier's Set.A.Light to the final frames, it's remarkable how closely they match up. This consistency emphasizes the effectiveness of thorough planning and prep to make sure that the idea in my head translates seamlessly from concept to reality. By taking time in prep to create the pre-vis images, I was able to establish a clear plan for the shoot, making it easier for the entire team to understand and execute the desired look, lens choice, and camera placement. By getting these to the crew early on, I eliminated time on set that I would have spent answering those questions, and the crew could dive straight into building the cameras with the desired lenses and rough-in the camera placement while I focused on lighting.
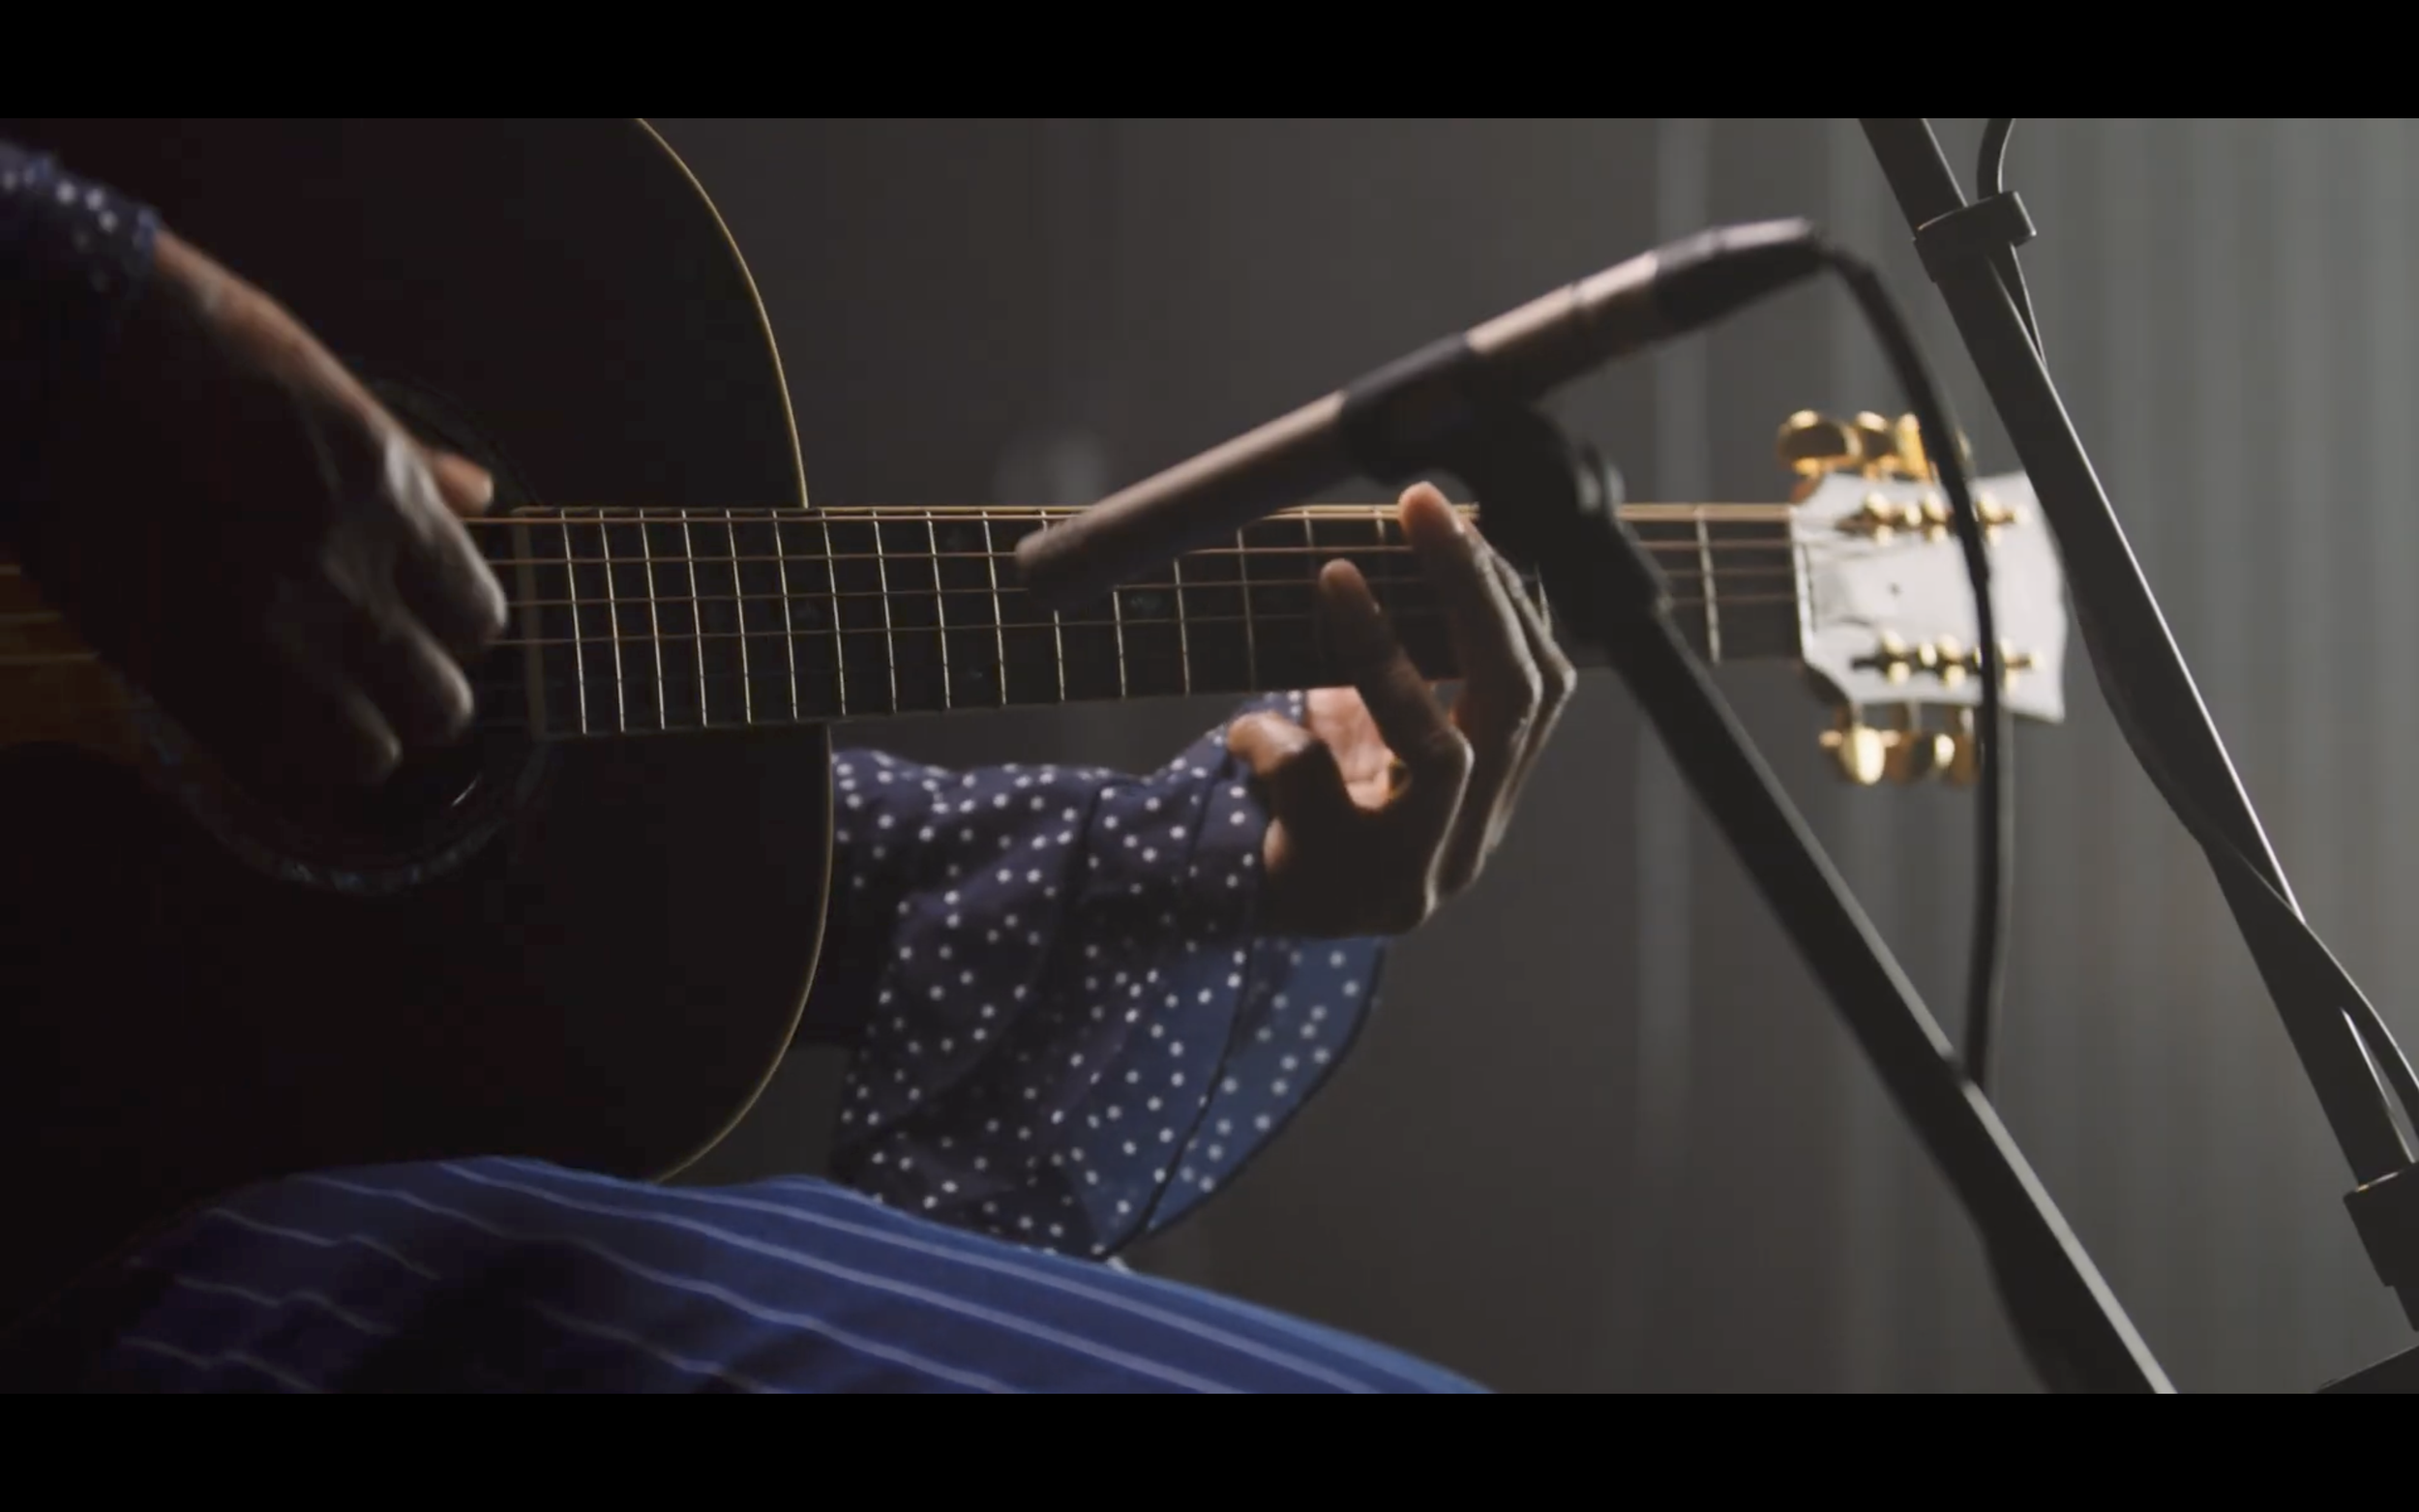
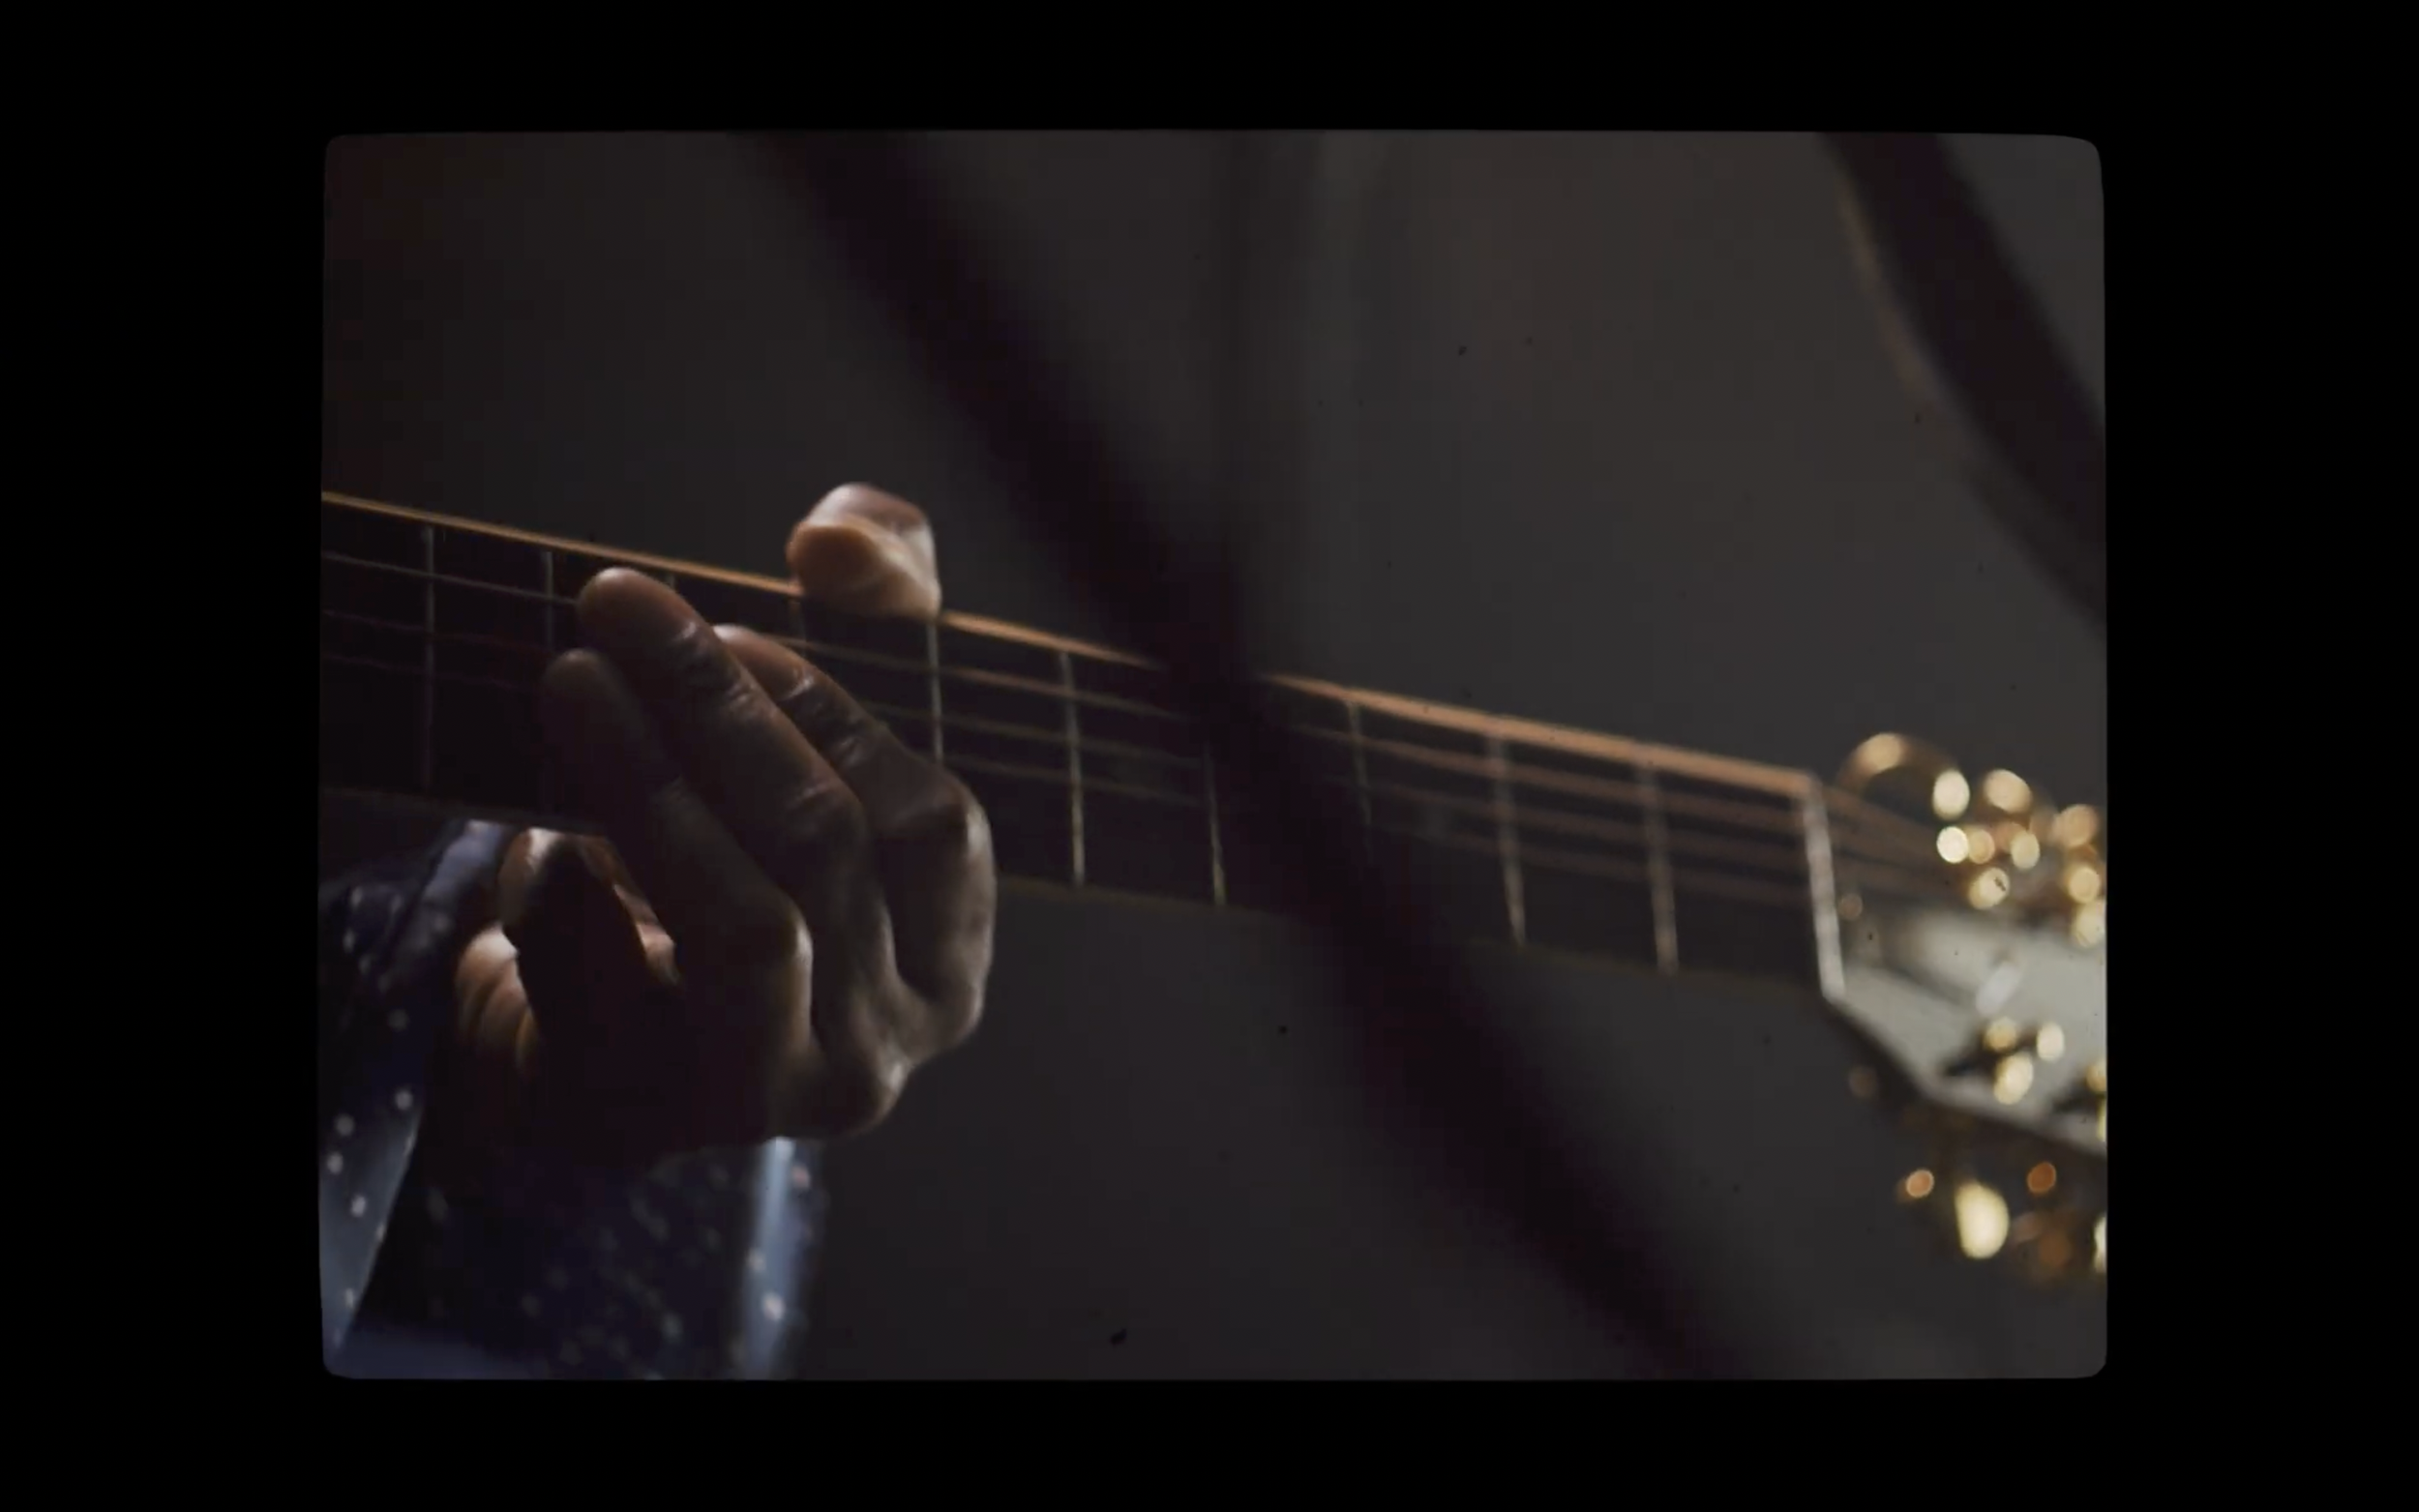
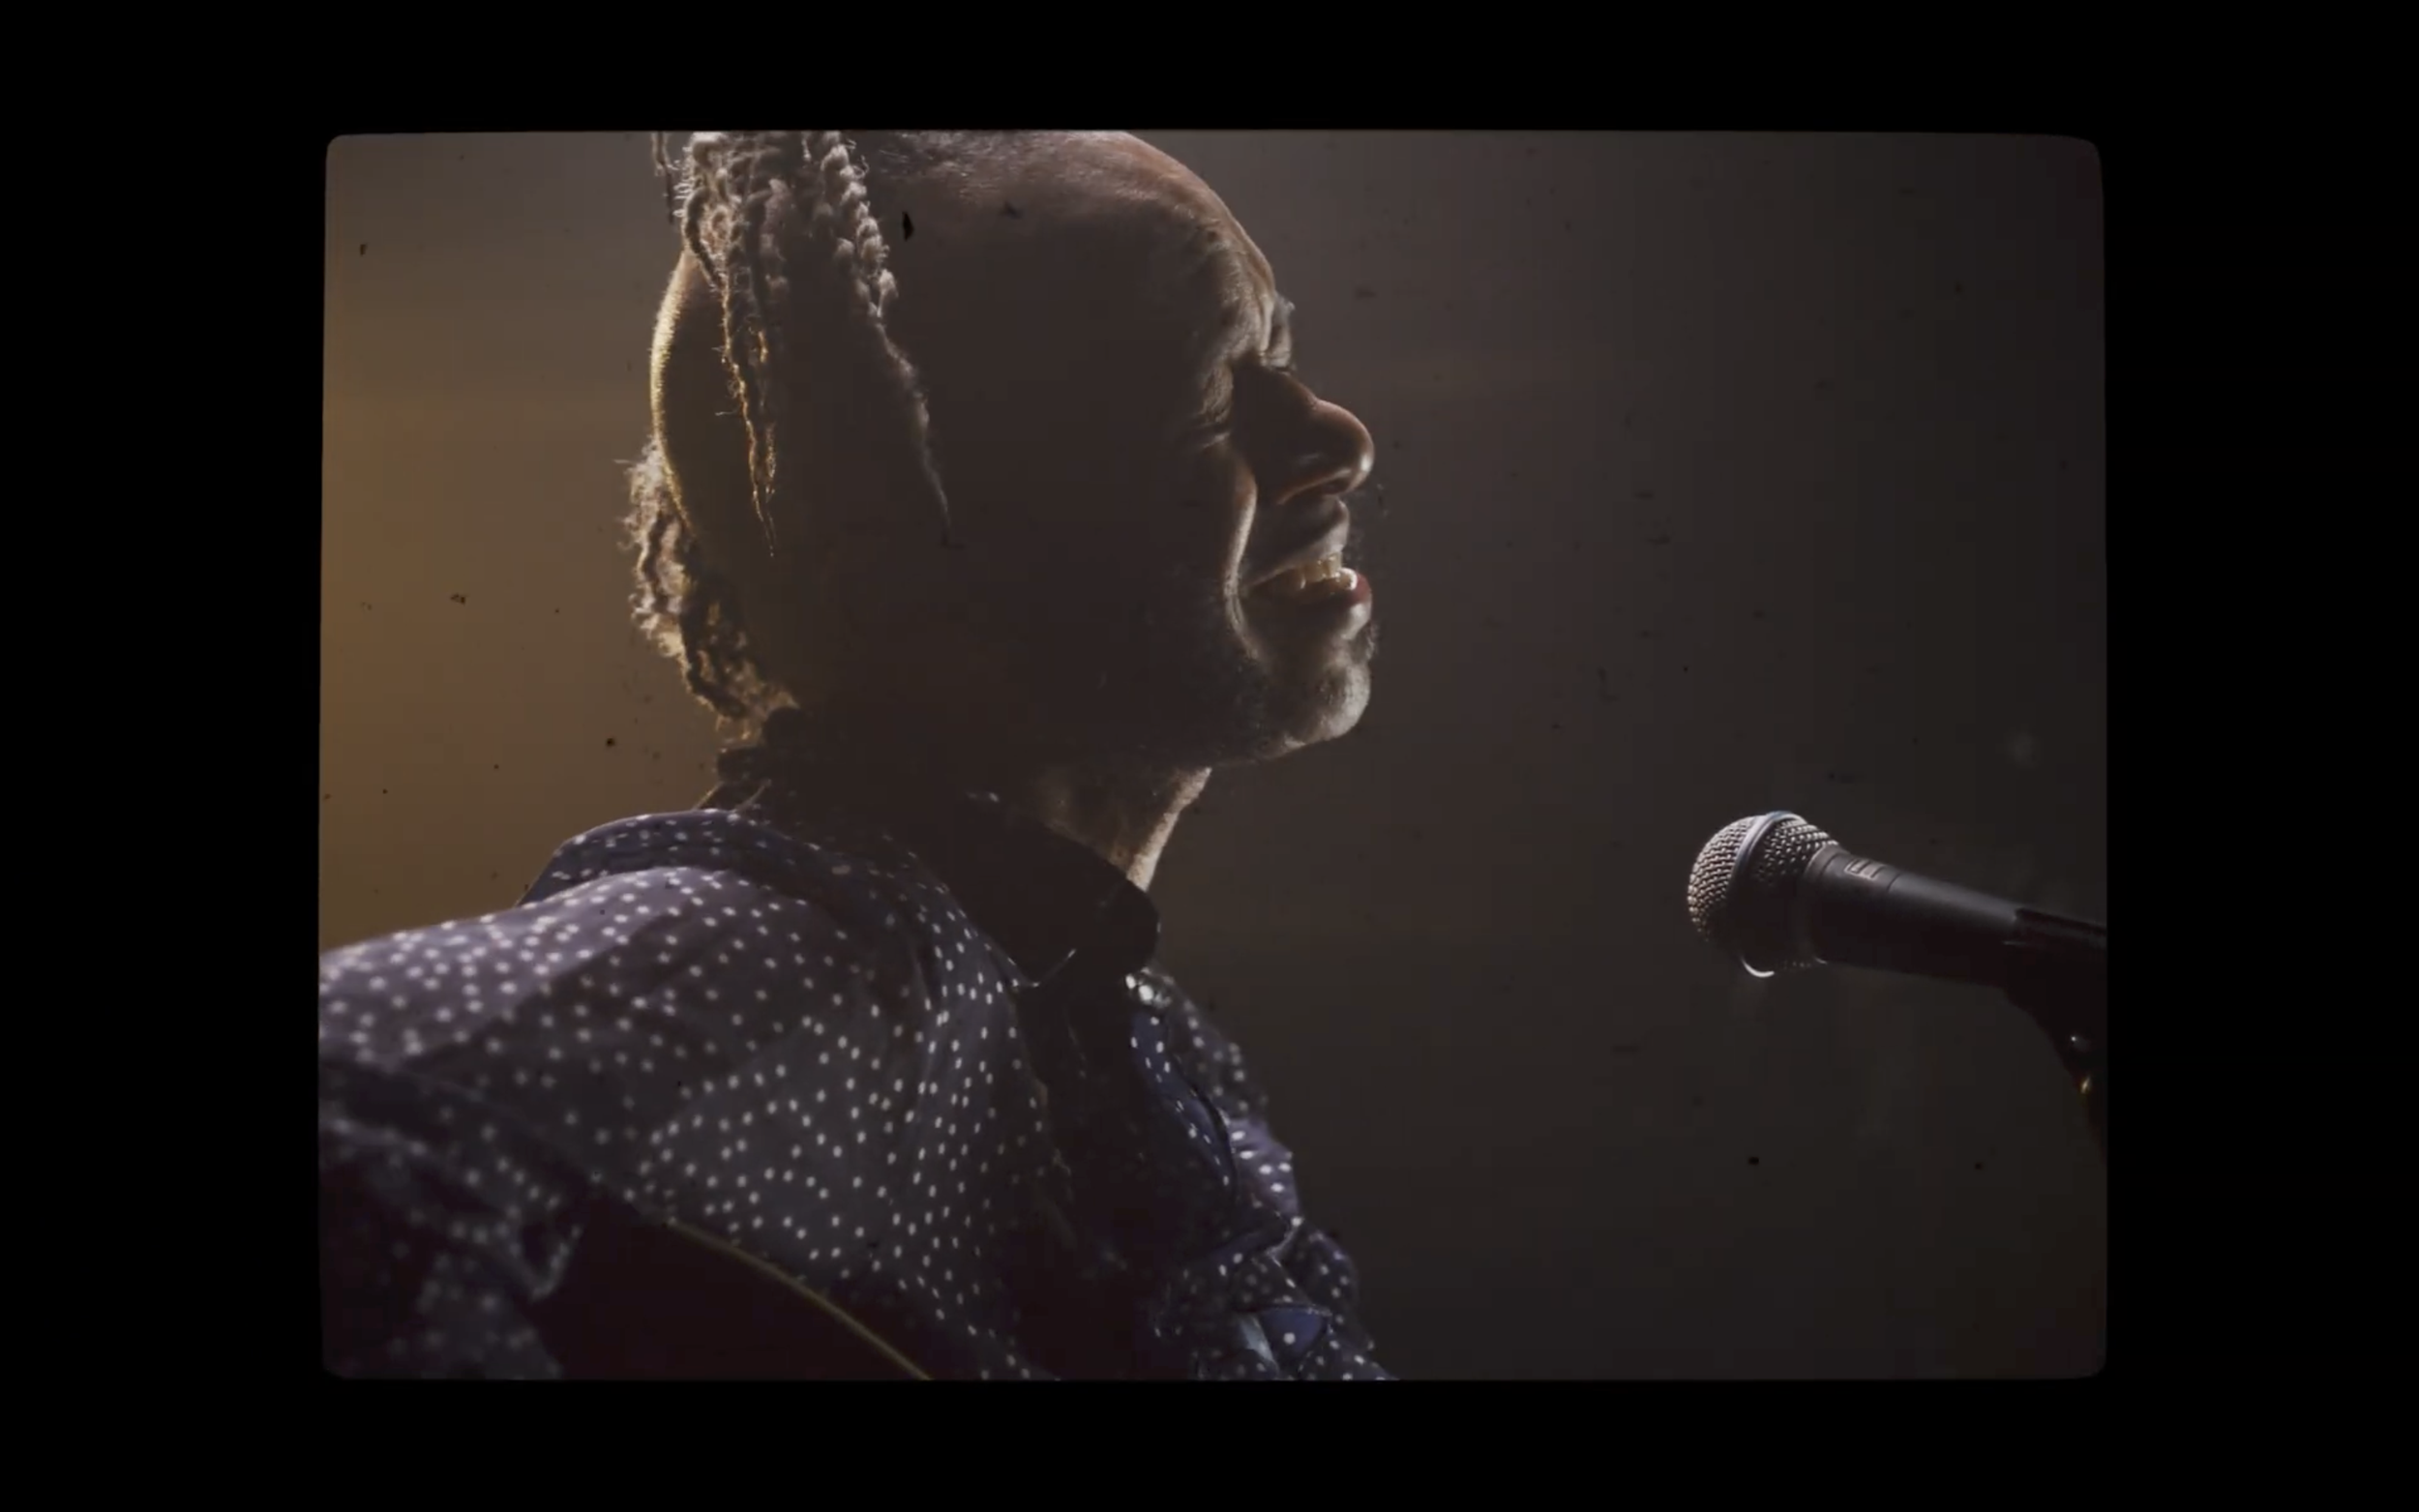
On every shoot, however, there are times when changes to the plan need to be made on the fly. This happened during the shoot when the last frame from the pre-vis image didn't look as good on set as I had initially hoped. Instead of sticking to the original pre-vis frame, we tried out a few different placements and lenses to find a better shot. We ultimately decided to shoot tighter shots of the hands playing the guitar from that angle, which I feel was a more visually engaging choice. This last-minute change to the plan not only enhanced the final piece by giving the viewer a more intimate look at the guitar playing but also served as a reminder of the importance of remaining flexible and open to adjustments on the day.

Lighting the Performance
Creative problem solving for location logistical constraints

Lighting Plot for Performance
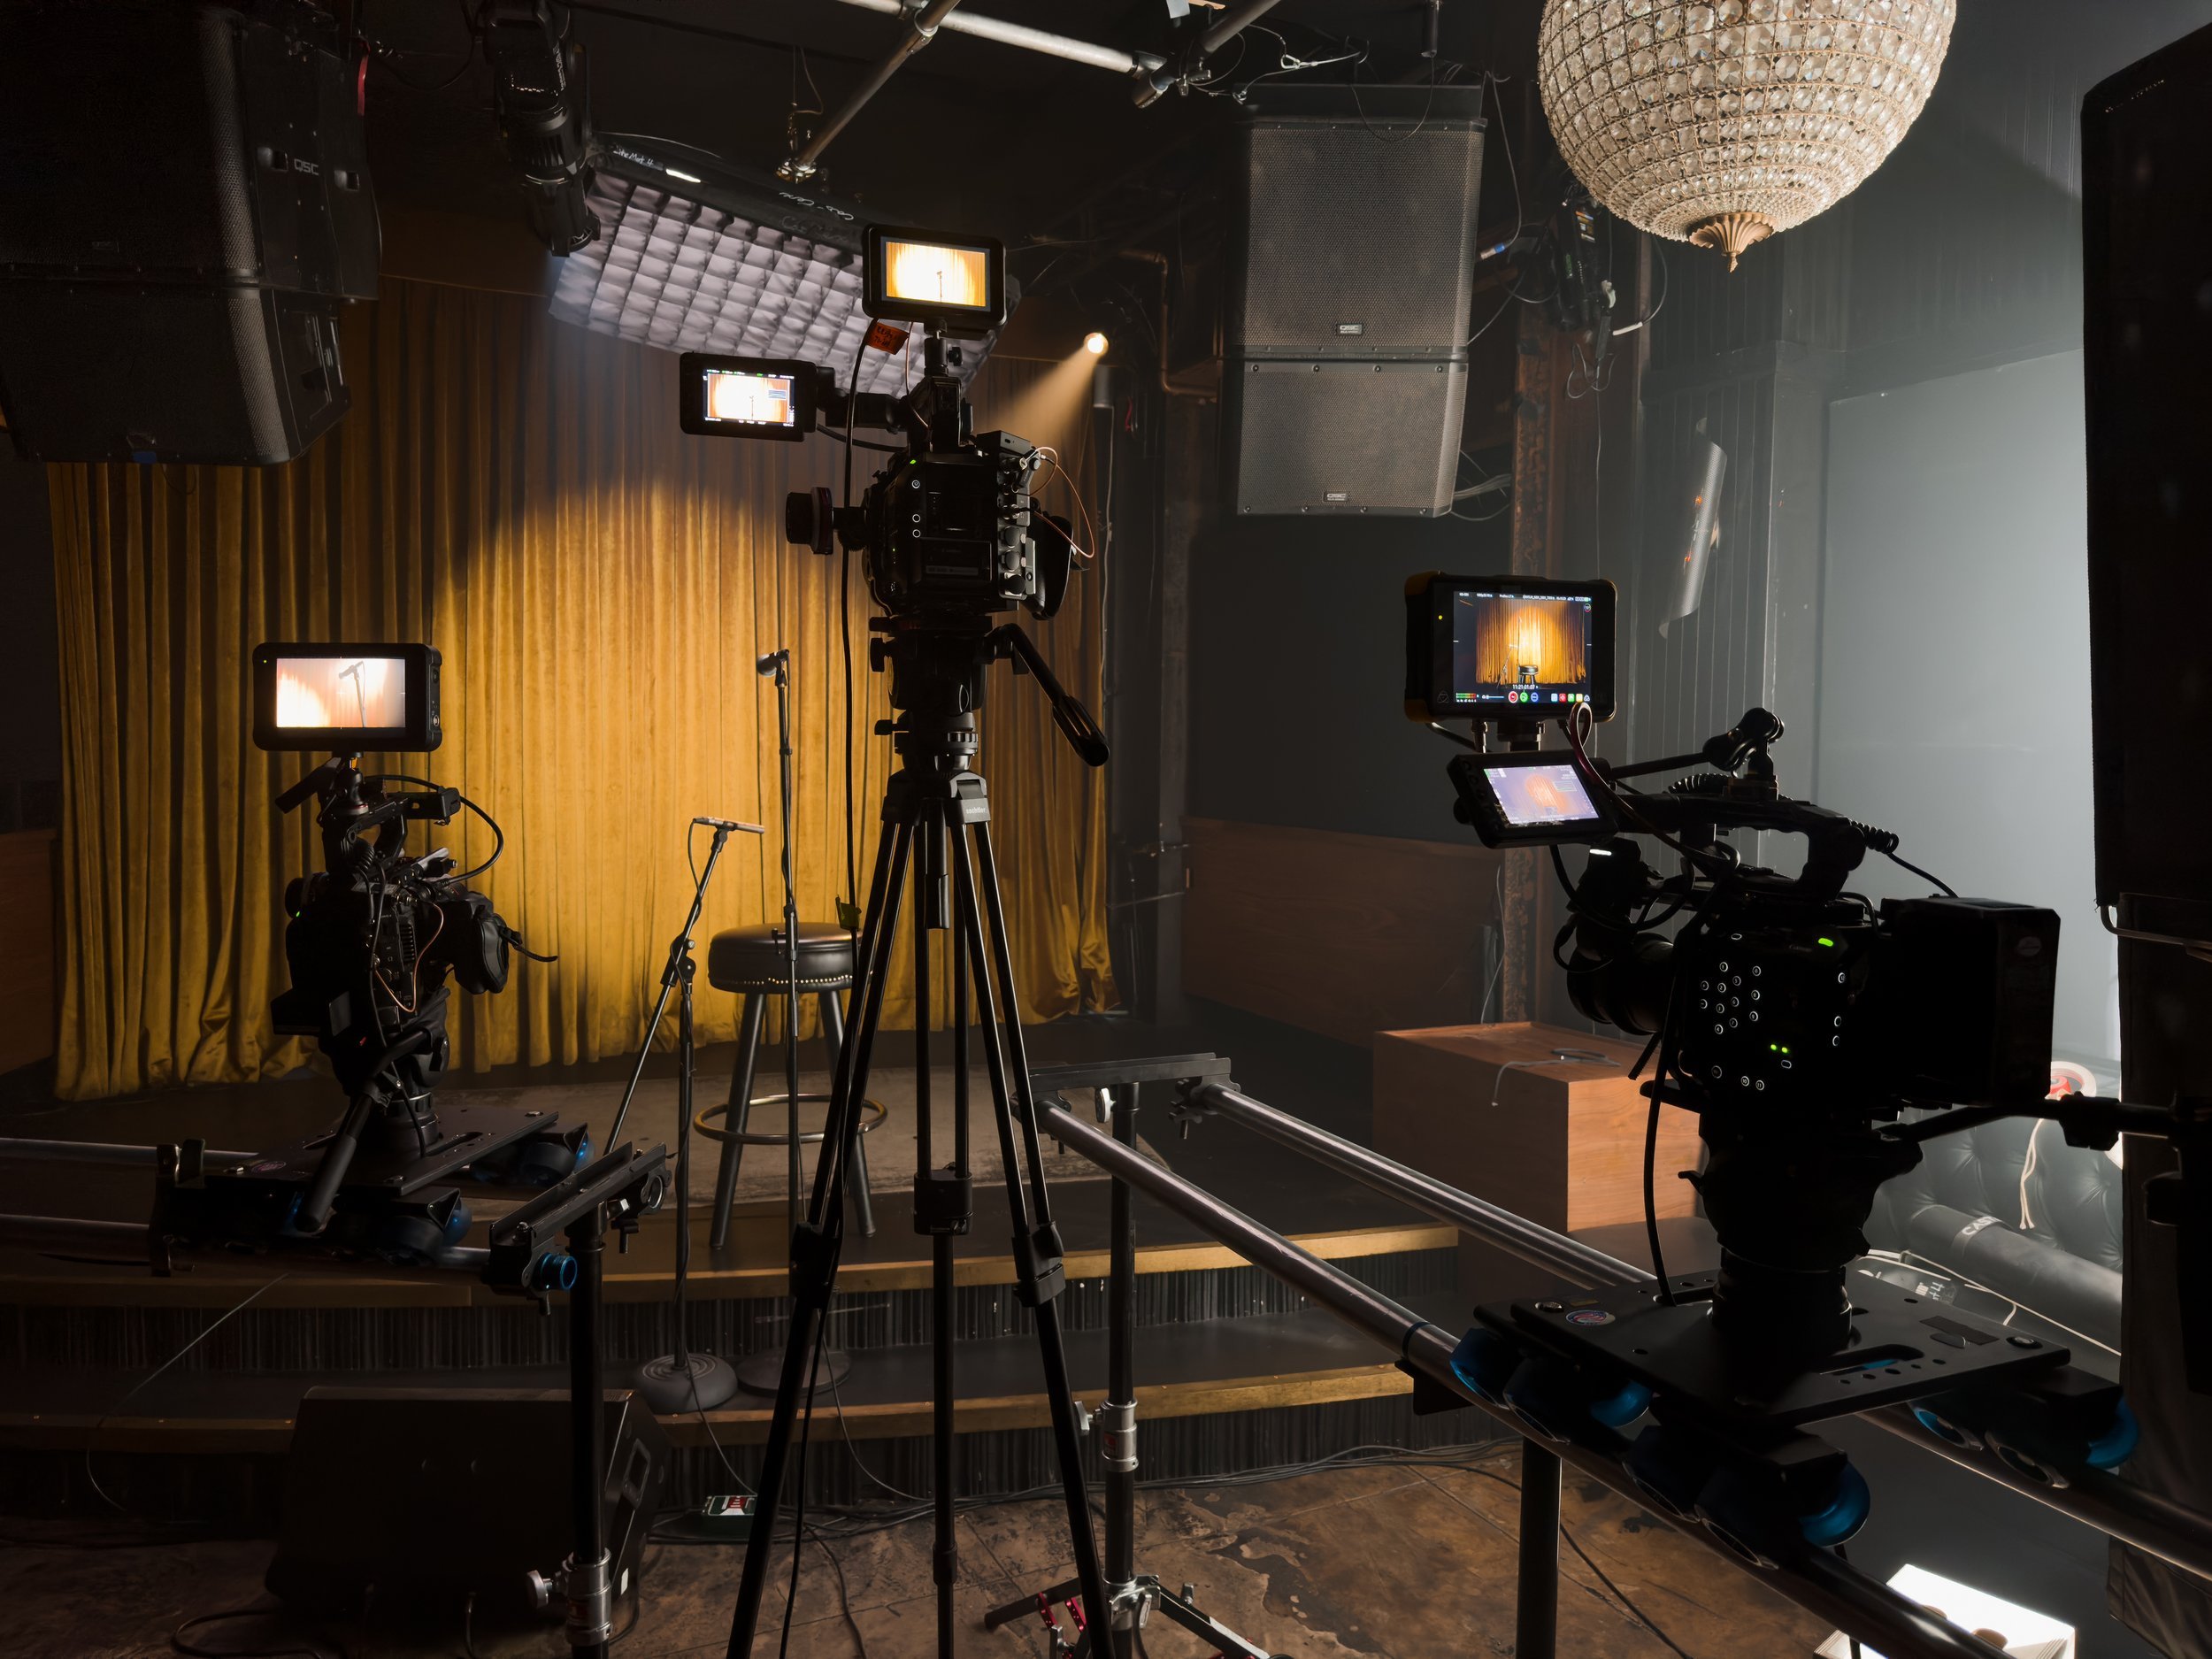
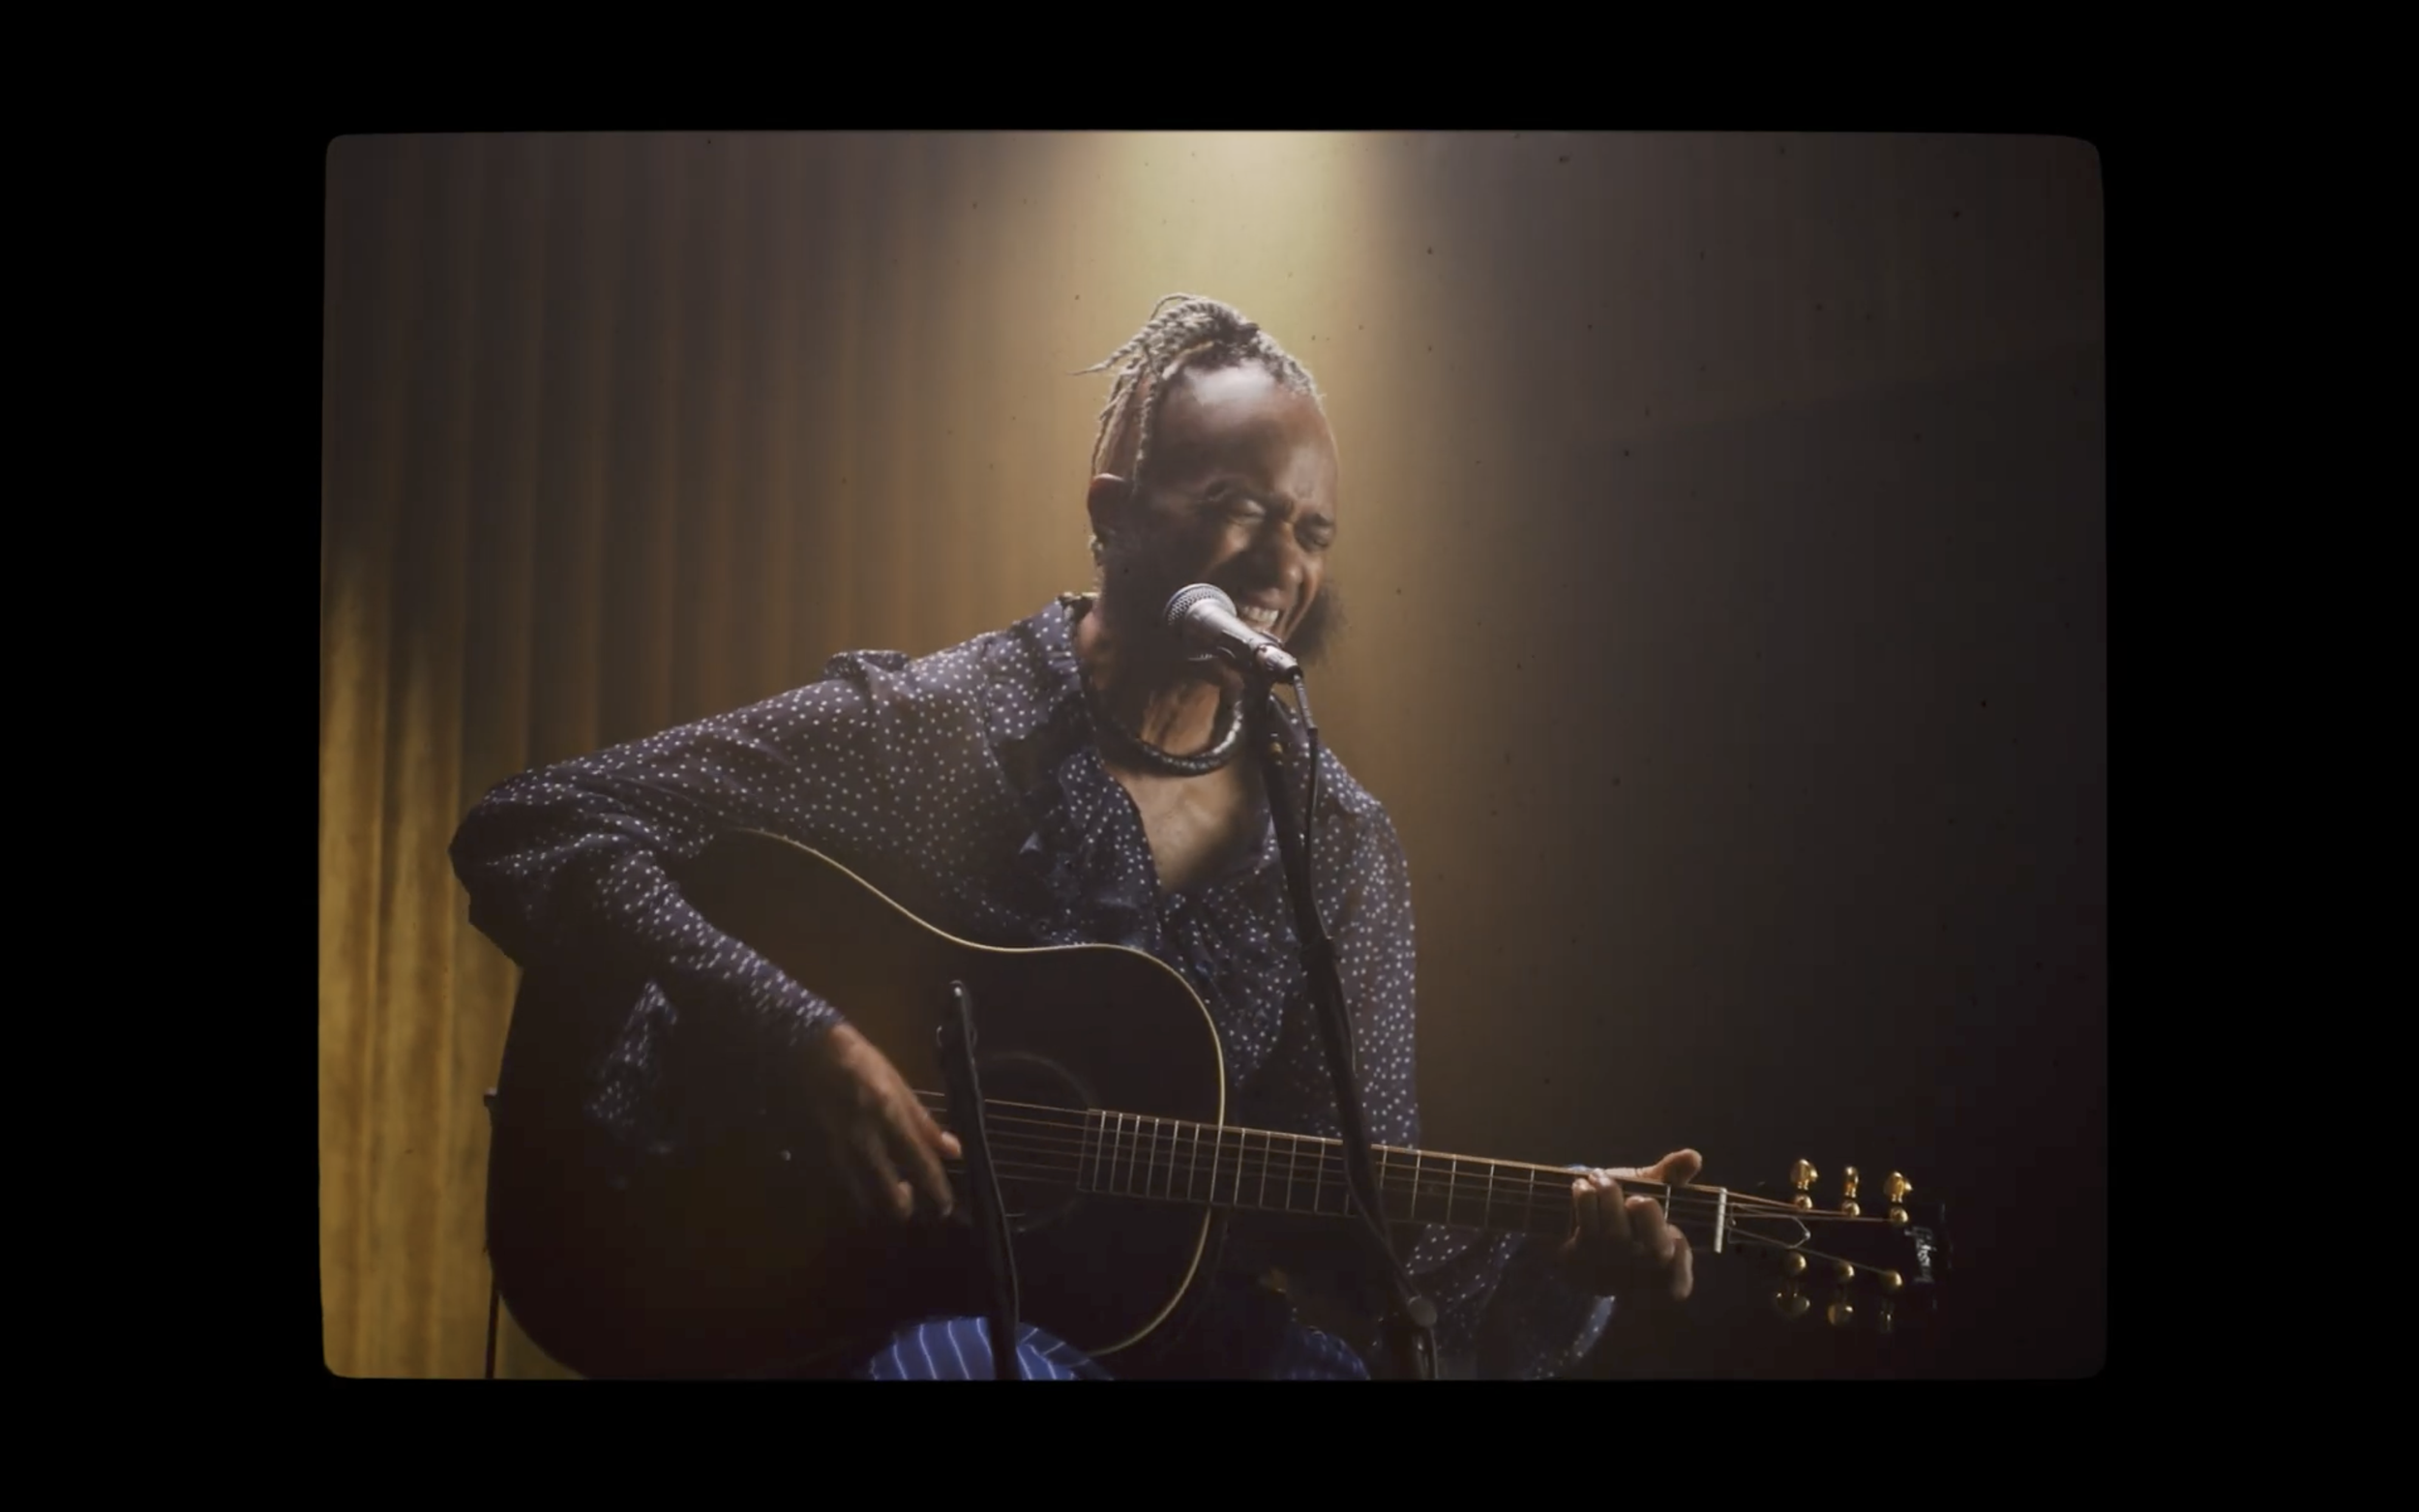
The performance lighting was the biggest challenge, as we had to accommodate five cameras (two of which were on dana dollies) while also making sure the talent was well-lit on stage. The stage itself did not have an overhead grid or any rigging points above. This meant that we had to come up with a creative solution to light the performance without the lights getting in the way of our camera placement.
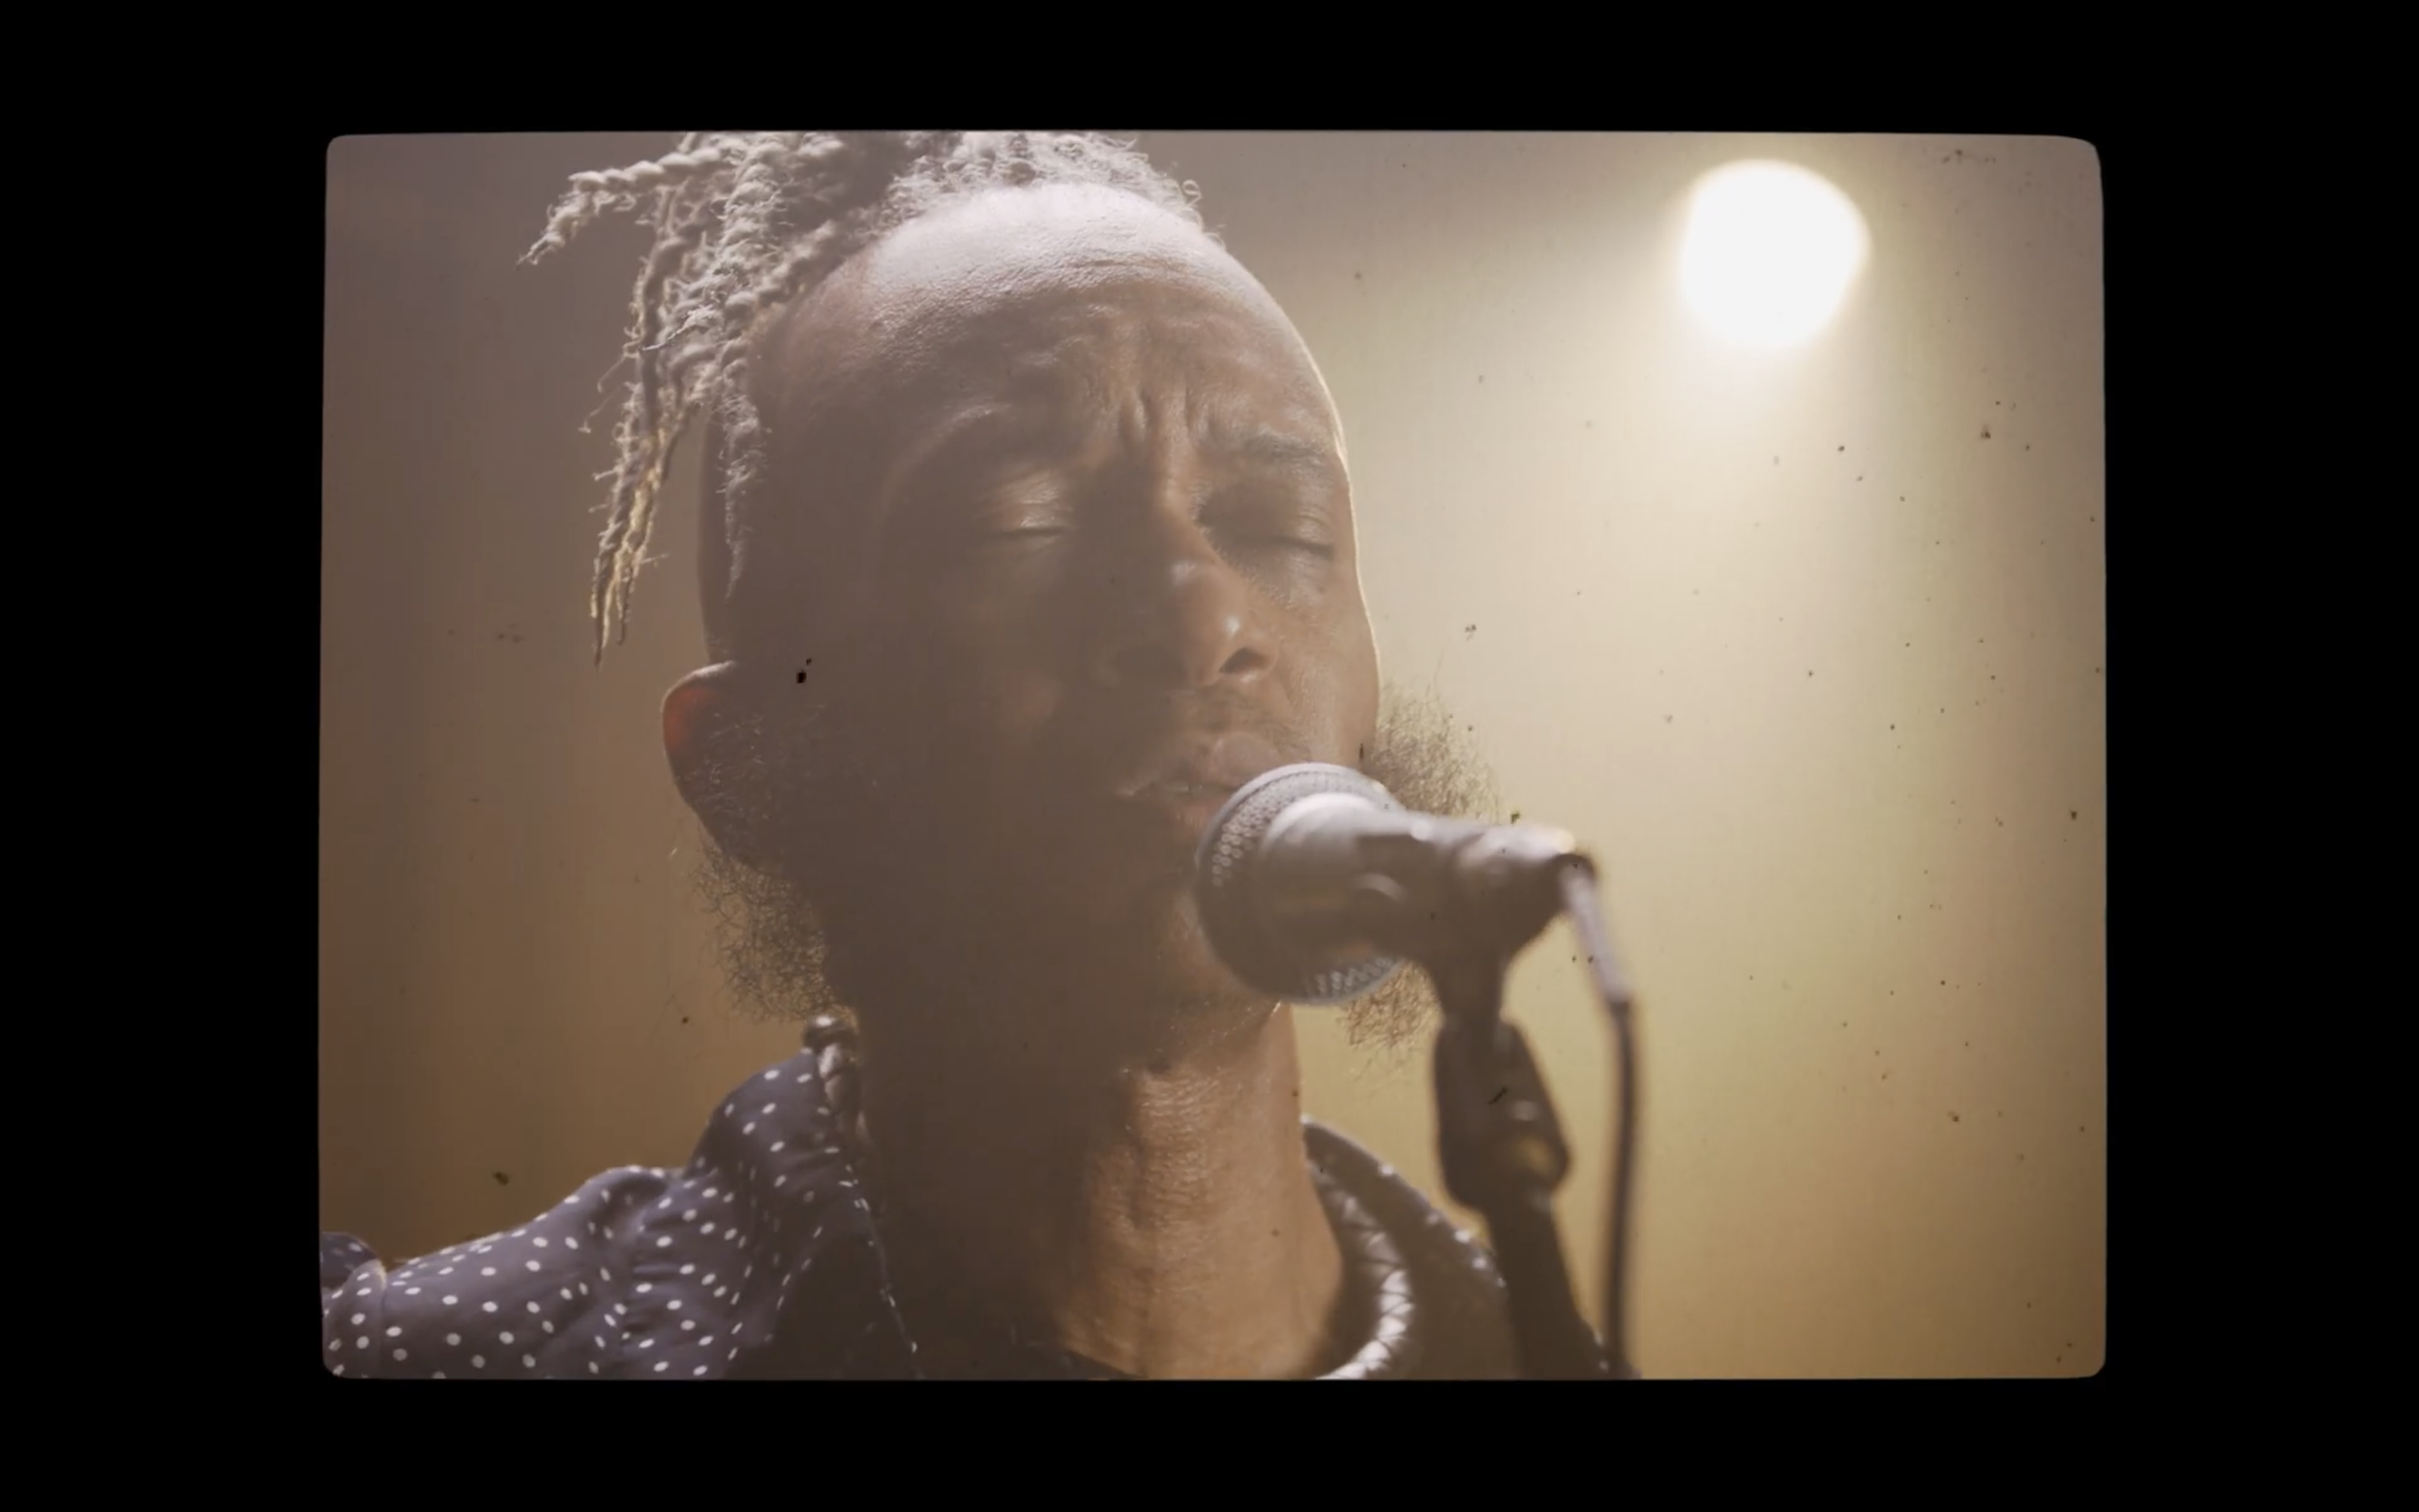
I knew I wanted to use a single large, soft light source as the key light for this shoot. After reviewing previous episodes in the series, I noted that many of them had used two lights through light dome softboxes for the key light. However, I found that when the reflections of these two distinct dome shapes appeared in the guitars or the talent's eyes, the result was a bit distracting and less appealing.
I initially thought about using an 8'x8' diffusion frame to light the talent, however after scouting the location and taking into account the space we will need for all 5 cameras, I decided to opt for a smaller 6'x6' diffusion cloth instead. This adjustment allowed us to achieve the desired soft lighting effect while accommodating for the limited space on location.

Original Lighting Plan, 1200D straight through diffusion.

Final Key Lighting, 1200D Book Light
I rented a few different diffusion cloth options to see which one would provide the best results. My initial plan was to key with an Aputure 1200D through a 6’x6’ Unbleached Muslin diffusion. While the Unbleached Muslin added a pleasant warmth to the light, the material was too thick and reduced the light output more than I had anticipated. So, I decided to try option 2, and switch to a 6'x6' Magic Cloth diffusion.
After seeing the light quality through the camera, I noticed that the light was still a bit too harsh with the 1200 going straight through it. I needed to get the light further back, but we were running out of room, so I decided to use a mirror positioned to the right of the light (see top left photo) to create a book-light effect, effectively doubling the distance the light traveled before passing through the diffusion which helped soften the light even more.
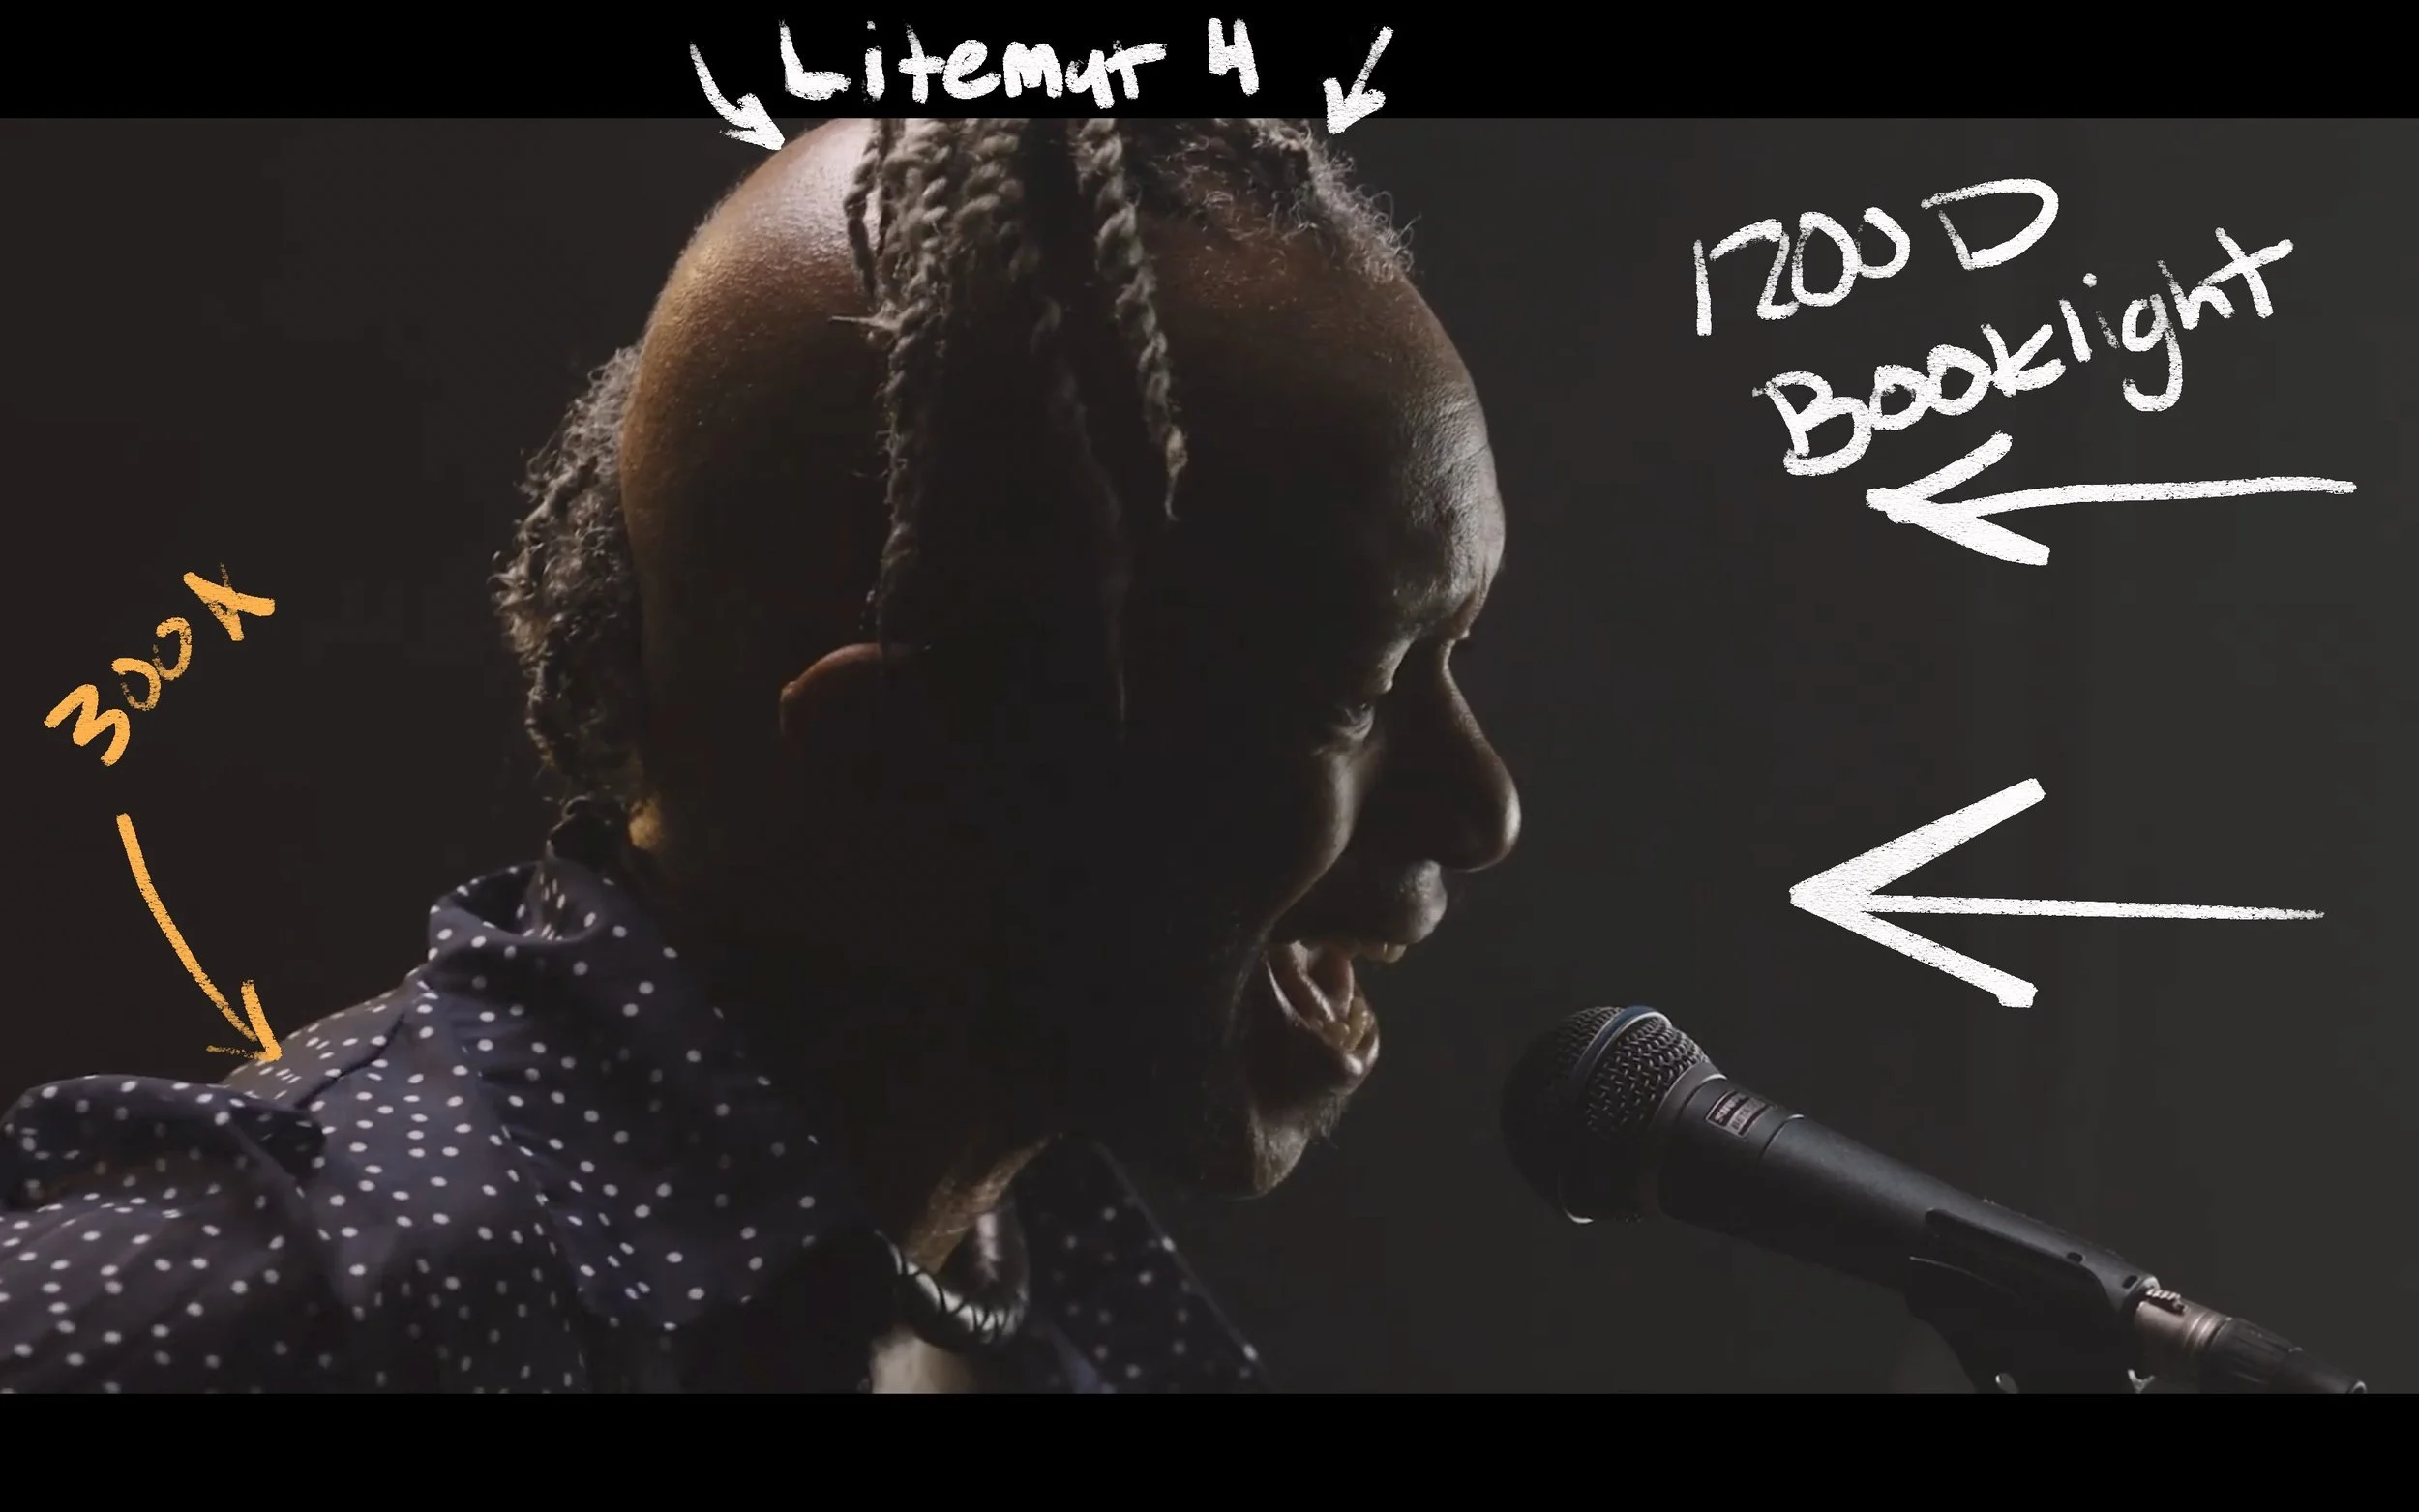

Next, we added a 4'x4' ultra bounce floppy to enhance the bounce effect of the book light and minimize light spill on the rest of the set. The mirror, which we found on location, proved to be a game-changer, giving us the ability to achieve the quality of light I was hoping to get out of the key light. Finally, we added in our backlight, an Aputure 300x with a 26º spotlight attachment which we placed at the back of the stage and mounted to the lip of an I beam in the back with a C Clamp with baby pin adapters on it. After the key and backlight were in place it was time to tackle the most complicated part of our lighting plan, creating an overhead lighting grid on location.
Creating an Overhead Lighting Grid
Custom built Solution for lighting Small Spaces

During the location scout, I came up with the idea to create our own lighting grid, which would provide us with the flexibility and control needed to light the stage effectively without having to have the light stands on the ground, which would take up valuable space in the already cramped location. Another challenge this location posed was the built-in chandelier over the center of the stage as well as the fixed speaker system at the front. We could not remove or reposition either of these, so I had to carefully plan my lighting diagram to accommodate and work around those constraints.
My idea for the lighting setup was to mount an Aputure 120D II with a 36º spotlight from the ceiling and add a soft top light using a Litemat 4+ from above to give the scene depth and dimension while ensuring that the talent was well-lit. Not having a dedicated Key Grip, the task of implementing this idea fell onto me. So, I spent several hours going over the rental house's catalog, carefully piecing together the equipment required to build the custom grid.
I had seen a post on Instagram a few weeks prior that utilized Split C-Clamps to secure speed rail, (1 1/4” aluminum pipes often used for scaffolding) onto larger beams that a traditional C-Clamp is too small for. I had previously measured the length of the overhead beam on my location scout using my iPhone, and they were too wide for even the largest C-Clamp, so I knew that the split C-Clamps would be needed to make this work.

Split C Clamp

When setting up the overhead rig, we used two 4' lengths of speed rail, two 3' lengths for attaching the split C-Clamps, and two 5' speed rails to mount the Litemat and the Aputure 120D respectively. We began by building the rig on the ground, making sure all split C-Clamps, over-under connectors, and pipe clamp pieces were correctly oriented. Since we only had one ladder, we had to be resourceful when raising the rig onto the beam.
To help us with this process, we added a few extra pipe clamps to the rig: one with a junior adapter and another with a baby pin adapter. We then mounted the rig onto three combo stands—one on the stage and two on the ground level just below the stage. This method allowed us to safely raise, lower, secure, and adjust the grid's position on the beam without risking any damage to the crew or gear.
Once we found the ideal position for the rig on the overhead beam, we taped a couple of cribbing pieces (small wood blocks) to the beam to prevent the C-Clamps from causing any damage to it. As an added safety measure, we attached safety chains from the grid to the venue's fixed speaker system mounting points, ensuring that the rig was extra secure throughout the shoot should something go wrong.
After the speed rail grid was secured in place, we added our Litemat 4 and Aputure 120D to it, keeping the cable distribution organized and out of the way. Initially, we placed the 120D light on the far end of the 5’ speed rail, but even with the 36º Spotlight, the beam was too narrow to achieve the desired look, however pulling the unit back toward the beam got the light in the right spot for our spotlight on the curtains.


As we got all 5 cameras into position, it became increasingly apparent that the overhead grid made a huge difference in our workflow. Not only did it allow me to get the lights out of the way of the cameras, but it also allowed us to fine-tune the placement and angle of each light to achieve the look I had set out to capture from my pre-vis stills.


In the end, our ability to overcome the limitations in the size of the stage and design a functional, custom lighting solution highlighted the importance of being able to adapt to the constraints a location might present. By being flexible with my framing decisions when the image I came up with in prep didn’t work as I had hoped, I was able to transform what could have been a challenging situation into an opportunity for growth and creative problem-solving, and the end result was better than I could have imagined.
Slow Motion B-Roll
Shooting handheld to capture intimate moments of the performance.

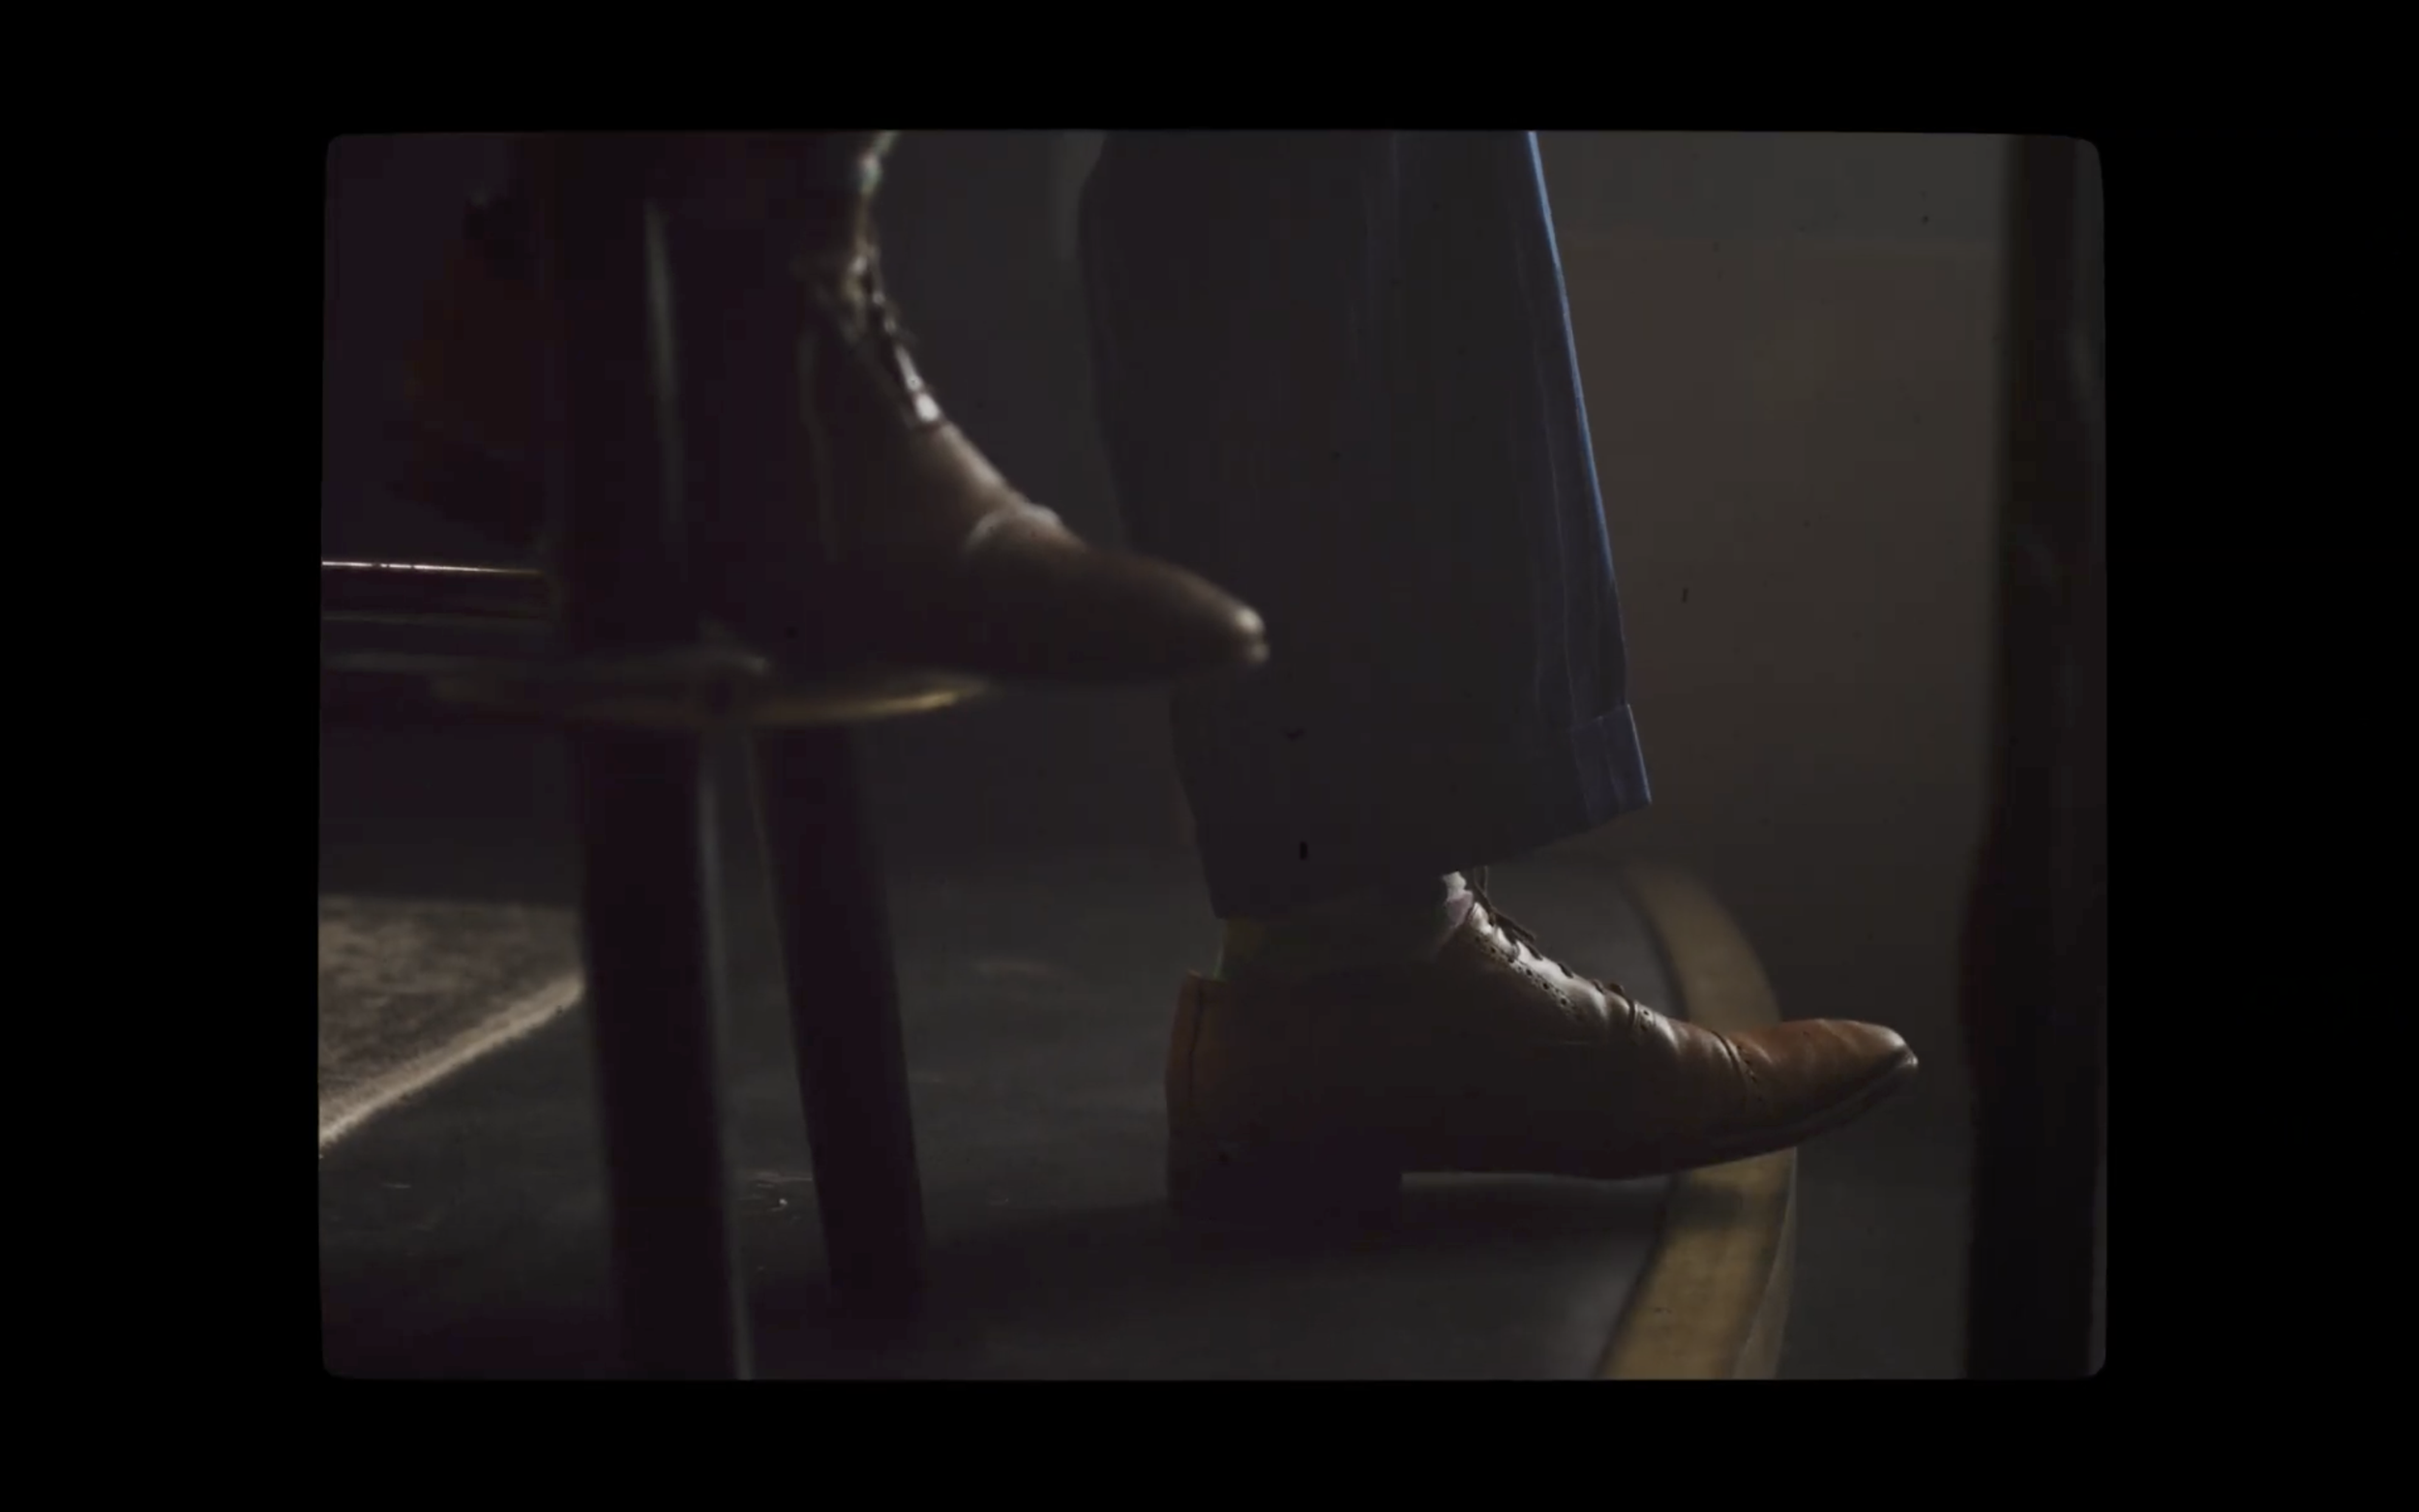
Once we were done shooting the performance setup, we moved to shooting the slow-motion B-roll segments which would play a big role in enhancing the overall mood and tone of the final piece. I shot the B-roll at ISO 1250 on a Leica R 50mm f/2 lens which opened up to allow for more light to hit the sensor, both of those changes helped to compensate for the exposure loss when shooting 60 frames per second. I shot wide open to give the B-roll shots a more ethereal quality compared to the more stopped-down t/2.8 performance segment, which helped differentiate the B-roll from the performance and created distinct visuals for each section. In the edit, the team added heavy grain, film scratches, and a 4:3 border around the B-Roll to give it even more grit and differentiate it from the rest of the footage.

Since we didn’t roll sound during the B roll, the artist was free to perform and play anything they wanted, which I feel added an element of spontaneity and authenticity to the footage.

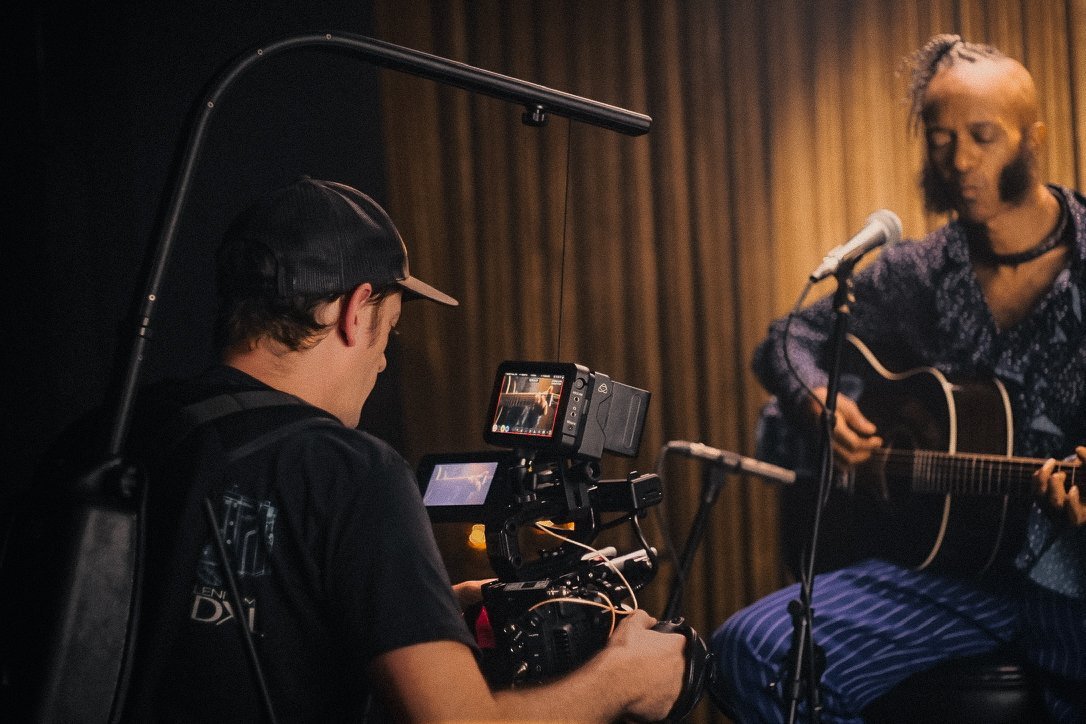
I shot the B-roll handheld using an Easyrig, which gave me the flexibility to quickly move around the stage and capture a number of dynamic moving shots of the artist while the rest of the crew started to move the cameras and lights over to the next setup, the interview.

The Interview
Creating depth in a small space
The Interview: Pre-vis vs Final Frames
When the plan comes together


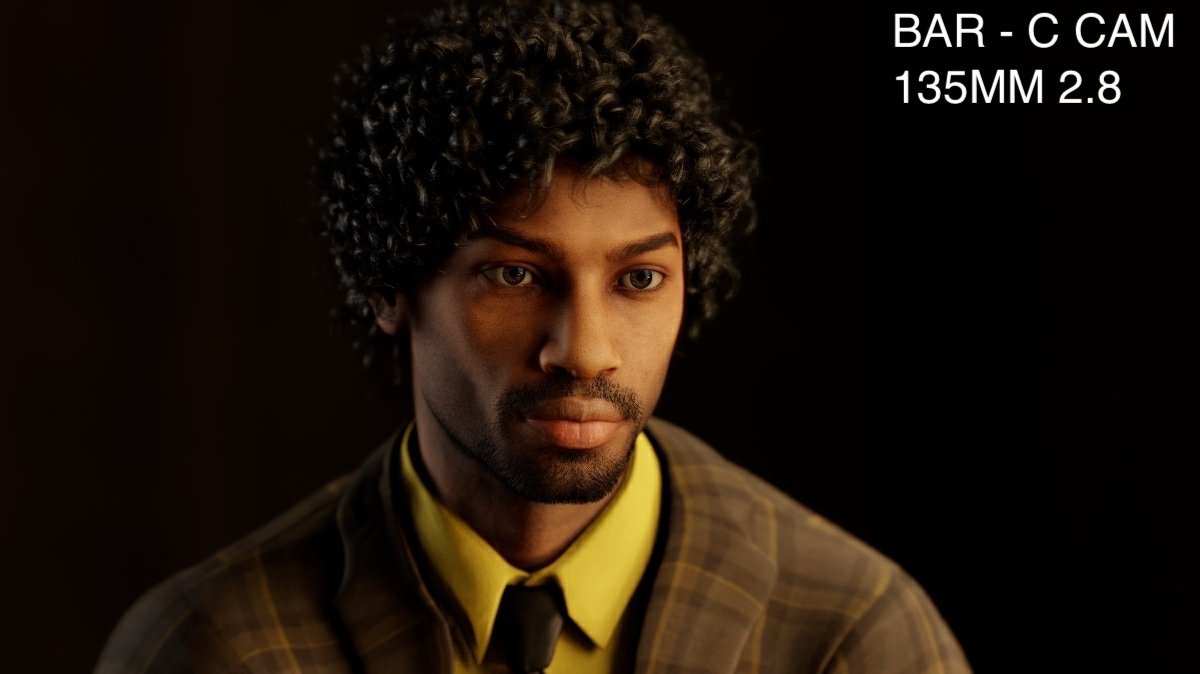


The interview segment of the shoot again highlighted the effectiveness of my pre-vis planning. Having created each frame in advance in Set.A.Light, matching the sensor size, t-stop, filtration, and focal lengths available, I was able to bring my ideas in prep to life and see them fully realized on the day of shooting. The frames we captured matched up nearly perfectly with the pre-vis images, which not only demonstrated the value of taking the time to create these in prep but also made the process more efficient, allowing my crew to know the camera placement in advance which reduced guesswork and setup time.

Lighting The Interview
Mixing hard and soft light

Lighting plot for the interview
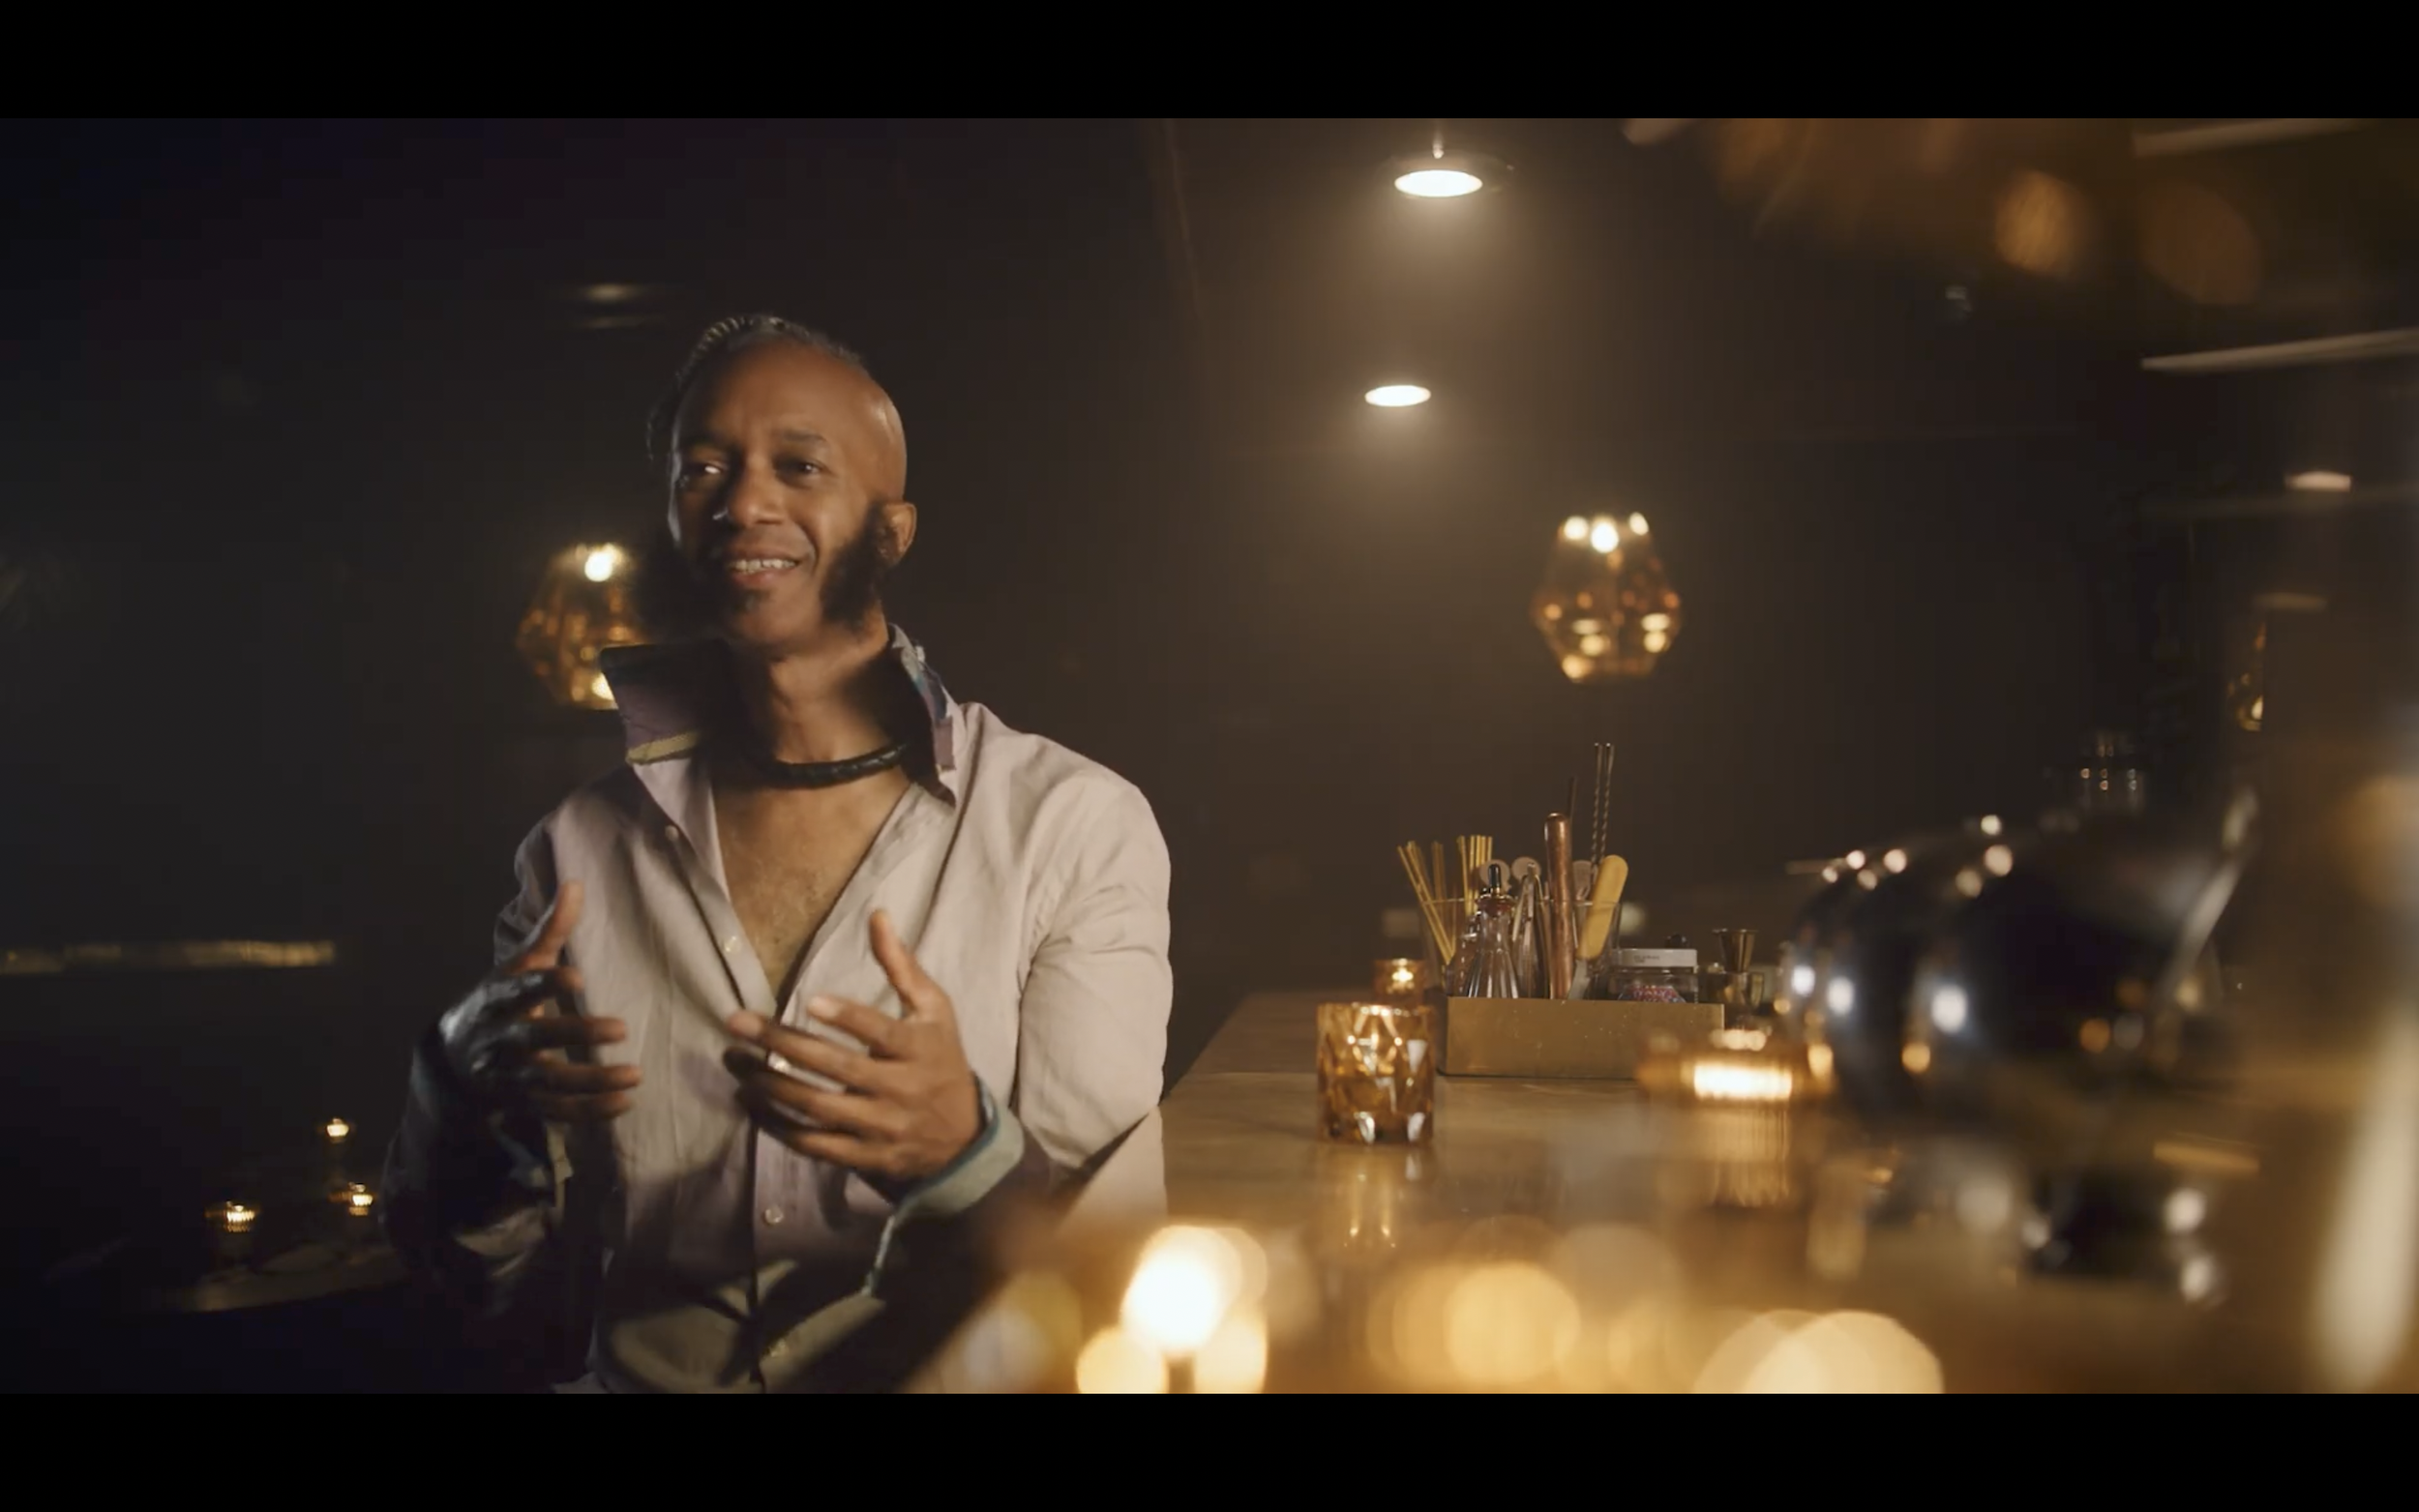
One of my favorite aspects of the bar location was the abundance of warm tones throughout the space. This gave us a rich and inviting backdrop for the interview segment, setting the mood and creating a visually appealing environment. To complement the warm tones, I dimmed all of the practical lights in the bar and unscrewed all the bulbs in front of the talent to reduce any unwanted fill light. This allowed us to have greater control over the lighting and get the look I was after.

I chose to shoot with my Leica R lenses on this segment to differentiate the look and add a subtle falloff to the image which when combined with the warm tones of the location, created a cohesive inviting look for the interview.

For the key light, I used a Litemat 4 with a DOP Choice Snapgrid to create a soft, wrapping light on the talent's face. To add a bit more dimension and contrast, I also used an Aputure 300x that was ever so slightly cooler in color temperature to add a bit of harder light on the body. I’ve been loving the combination of mixing hard and soft light for interview setups lately. I also added a back edge light using an Aputure Nova P300C, which I originally planned on using with a straw gel setting, but changed on the day to be more of a colder color temperature to create subtle color contrast. This helped create separation between the talent and the background, adding more depth and dimension to the scene.


In an effort to add even more depth, layers, and atmosphere to the interview segment, I added haze to give the bar a smokey atmosphere and help to add more separation to the image. Once the wide shot (above) was set, I added several bar glasses and tea candles as foreground elements in the shot to add even more layers of depth and separation.


In order to add some dynamic camera movement to the interview, I used a Dana Dolly. I chose my 90mm F/2.8 Leica R lens for this shot, as the increased longer focal length helped to create more separation between the subject and the background. I found the texture of the bottles in the background when they were out of focus created a very pleasing texture and the subtle reflections gave me a visually interesting backdrop without being overly distracting.

That’s A Wrap!
Conclusion
This project gave me a great opportunity to continue to learn and grow as a cinematographer by overcoming the various challenges that came up, like working within a tight schedule, dealing with space limitations, coming up with creative lighting solutions and managing multi-camera setups. I am immensely proud and thankful to the hard-working crew who, as always, played a crucial role in making this shoot a success.
I hope this behind-the-scenes look into the making of this episode gave you some insight into the creative process and hard work that went into making this piece. If you want to keep up with me and my latest projects follow me on Instagram, and please feel free to share your thoughts or suggestions for future blog topics in the comments below.